Cisco Catalyst Center (Formerly Cisco DNA Center)
Use Cases
Multiple use cases have been enabled for the Catalyst Center, with many more use cases currently in development. The use cases will enhance the overall support experience and simplify the troubleshooting experience.
Step 1: Install the Chrome Extension
- Download and Install: Download the Cisco In Product Support Chrome extension from the Chrome Web Store and click "Add to Chrome" to install it, ensuring the browser extension is available for immediate use.
- Enable Extension: Once the extension is installed, ensure it is enabled by checking the extensions menu in Chrome and confirming that the Cisco In Product Support is active.
Step 2: Activate the Extension
- Navigate to Cisco Catalyst Center: Open Chrome and navigate to a supported Cisco product such as Cisco Secure Firewall to initiate the activation process.
- Pop-Up Activation: Upon visiting the supported product page, you will see a pop-up that says, "Unleash the power of TAC virtual assistants and activate Cisco In Product Support extension."
- Click to Activate: Click on the pop-up notification to trigger the authentication workflow.
- Authenticate: Complete the authentication process by entering your credentials and verifying your identity.
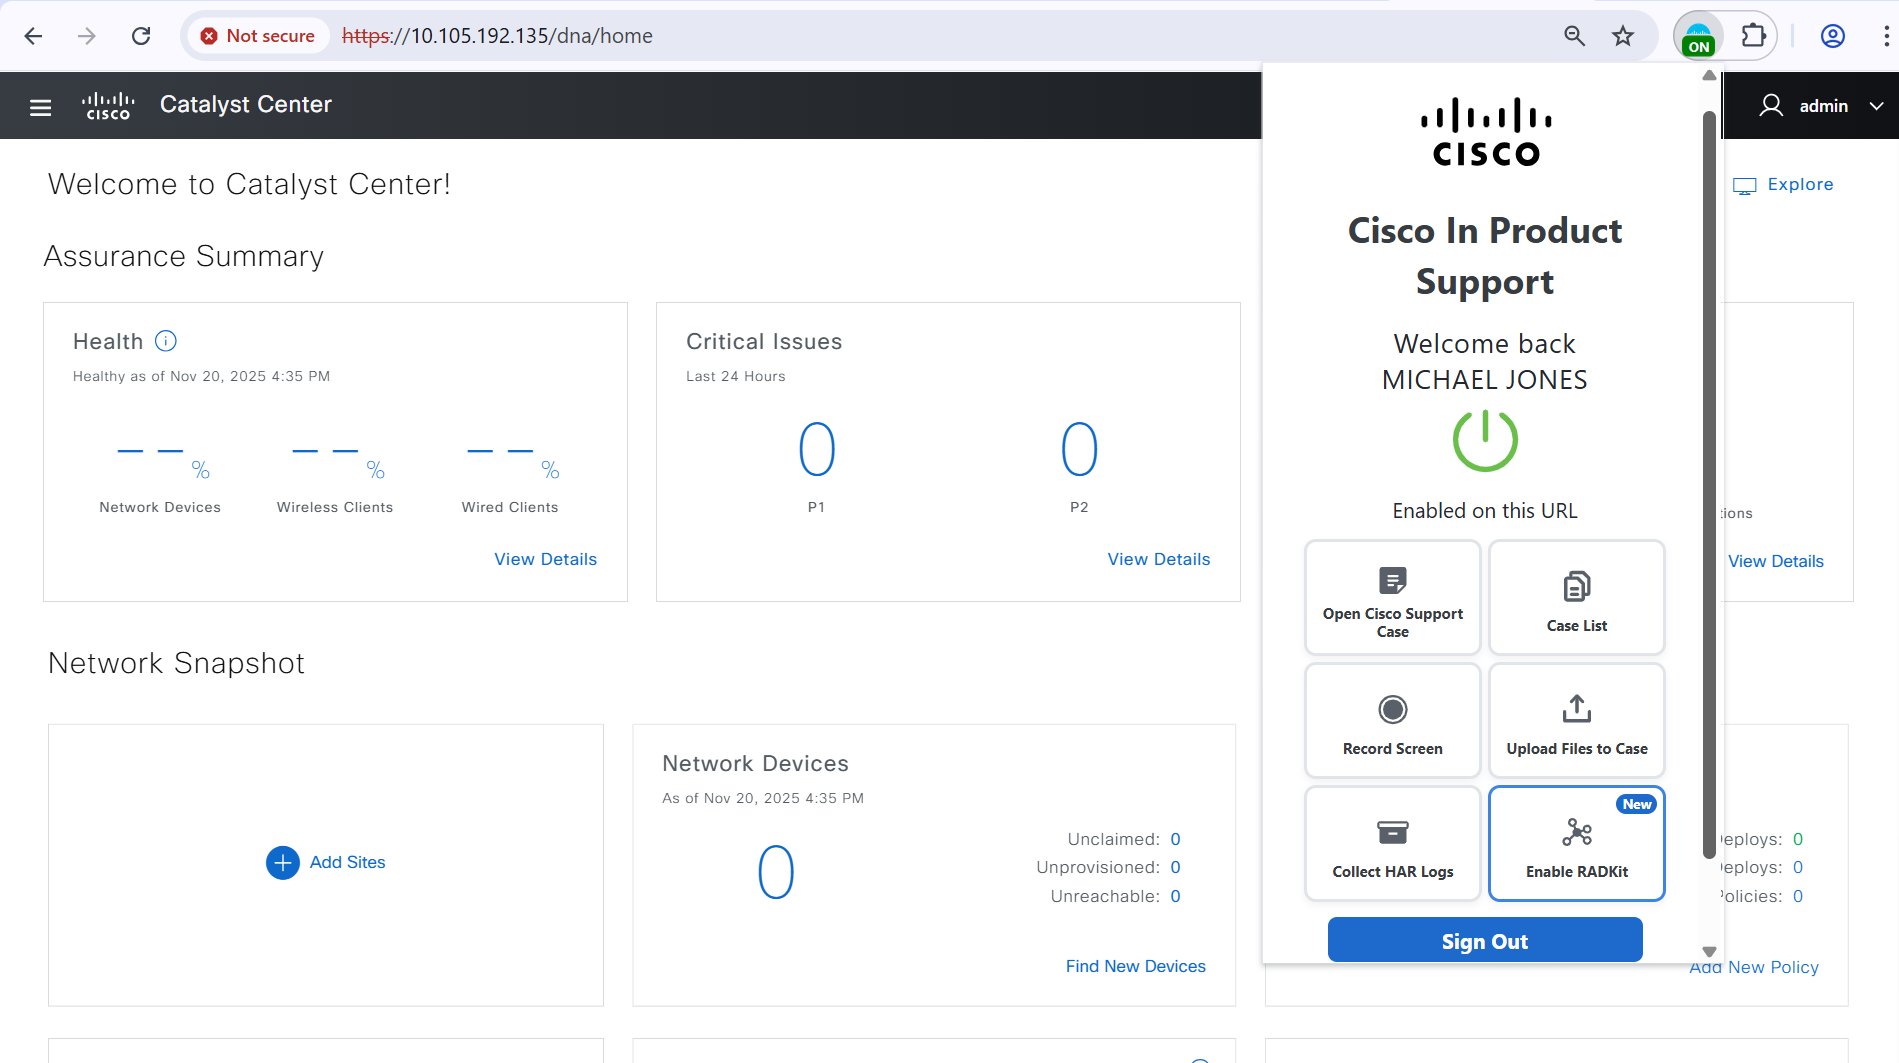
- Confirmation: Once authenticated, you will see that the extension is marked as "On," and your name will appear when you click on the extension icon in the Chrome toolbar.
Step 3: Using the Extension Features
A. Opening a Cisco Support Case
- Open Extension: Click on the Cisco In Product Support extension icon located in the Chrome toolbar to open the extension interface.
- Select 'Open Support Case': In the extension interface, choose the option to open a new support case, which will guide you through the necessary steps.

- Record Issue: Optionally, use the screen recording feature to capture and explain your issue visually and verbally, which can be extremely helpful for the support team (detailed instructions in Section B).
- Submit Case: Fill in the required details, such as the issue description and relevant information, and submit your support case through the extension interface.

- Upload Validation Tool: Enabling this option will navigate you back to the Catalyst Center post case open to create and collect the Validation Tool logs. This process usually takes 2-10 minutes and should not impact your system.
- Upload RCA Bundle: You can upload an existing RCA bundle or start a new one, which takes 60-90 minutes to collect.

B. Case Listing
Viewing Created Cases
- View Case List: To see the details and status of your created cases, click 'Case List' in the In-product Support extension.

- Cases Created: Once loaded, you'll see a list of your cases, including the Support Request number, Case title, Severity, last updated date, created date, and the current status.

- Expand for More Details: Expand any case row to view additional information, such as the case owner and manager details. You'll also have the option to view your case in SCM.

Search and Filter
- Search: Use the search field to find a specific case by entering the complete Cisco Support Case number. Partial entries will only match items that are currently visible.

- Filter: Filter cases by their status such as Open, Draft, or Closed, to quickly sort and view only the cases relevant to your needs. Only cases matching the selected status will be shown.

More Actions
- Refresh List: Click the refresh button to update the case list and display the most recent changes or updates.
- Sort Cases: Organize your cases by sorting the table rows based on different columns, such as date created, severity, or status.
- Navigate Pages: Easily browse through multiple pages of cases using the pagination controls at the bottom of the list.
C. Recording Your Screen
- Start Recording: Click on the extension icon in the Chrome toolbar and select the "Record Screen" option to initiate the screen recording process.

- Begin Recording: Follow the on-screen instructions to start the screen recording, capturing all relevant actions and information.

- Choose Recording Area: You will be prompted to select whether you want to record a specific Chrome tab, the entire browser window, or your entire desktop screen.

- Microphone Permission: Optionally, allow the extension to access your microphone to provide an audio explanation of your issue, enhancing the clarity of your recording.

- Add Screenshots: During the recording, you can double-click any screen to add a screenshot, which will be included in the support case along with the video recording.
- Stop Recording: To stop the recording, click the "Stop" option in the floating bar at the bottom of the screen or click on the extension icon and select the stop recording button.
- Upload Recording: Once the recording is stopped, you will have the option to upload the video to an existing case by entering the nine-digit Cisco Support Case number or open a new case.

D. Upload Local File to Case
- Upload File: Click ‘Upload Files to Case’ in the extension interface.

- Choose File: In the modal that pops up, click 'Choose file’ and browse through your local files to upload the preferred file.
- Select Case: Enter an existing Cisco Support Case number or open a new case to upload your file to.

- Allowed File Types: Allowed file extensions include jpg, png, mp4, and zip files. If .pkg or .exe files are uploaded, the pop-up will prompt an error message.
- Case Number Search: Conveniently, you can also enter a case number to search from a list of existing cases.
- Upload Confirmation: After clicking ‘Upload,’ allow a moment for your file to be added to the case. You will receive a confirmation prompt once your file has been successfully uploaded. Additionally, you have the option to cancel the upload while it is in progress.
E. Collect HAR Logs
- Initiate Log Capture: To capture HAR logs, click the 'Collect HAR logs' button in the extension pop-up.

- Navigation Instructions: You will be prompted with a message to reproduce the steps of your issue to ensure the HAR logs are accurately collected.
- Start Capture: Click ‘OK’ on the pop-up to initiate HAR log collection on the product page.

- Stop Capture: Once you have reproduced your steps, stop the collection by clicking the ‘Stop collecting’ button on the floating tab or open the extension pop-up and click on the ‘Collect HAR logs’ button again. Confirm the stop action in the prompt.
- Upload Logs: After stopping, a modal pop-up will appear. You can upload your HAR logs by entering a case number to add them to an existing case or creating a new case for the issue you've captured.
- Download Log File: Click the ‘Download’ icon to save a local (zip file) on your device.
F. RADKit Association on Catalyst Center
- Enable RADKit SN: The ‘Create RADKit SN’ button allows the user to enable RADKit Serial Number on products like FMC (Firepower Management Center) and DNAC (Catalyst Center). It sends automatic notifications (via email, Webex, and case notes update) to the TAC Engineer about the availability of the RADKit Serial Number for a specified Cisco Support Case for a predefined duration.
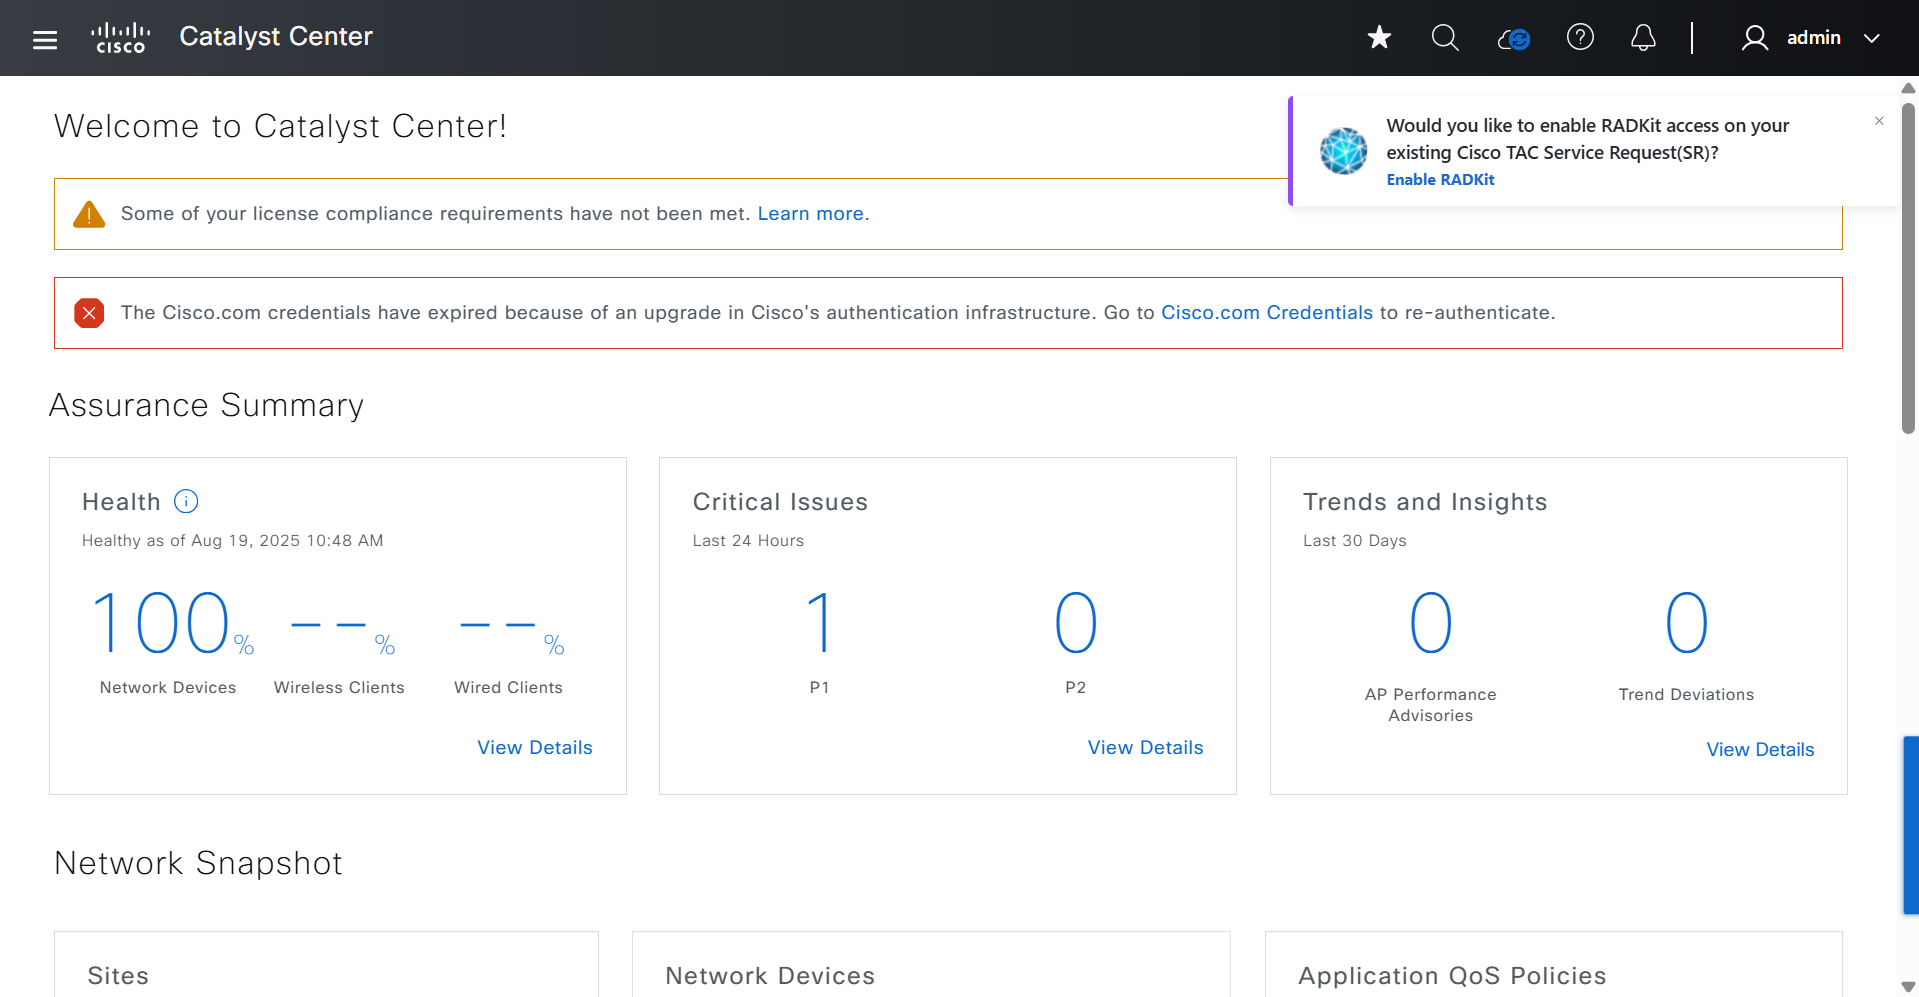
- Create RADKit SN: Click the ‘Enable RADKit SN’ button on the one-time pop-up displayed on the appropriate product screen. A modal will be prompted. Select the Cisco Support Case number to enable RADKit on, and click on the ‘Create RADKit SN’ button.

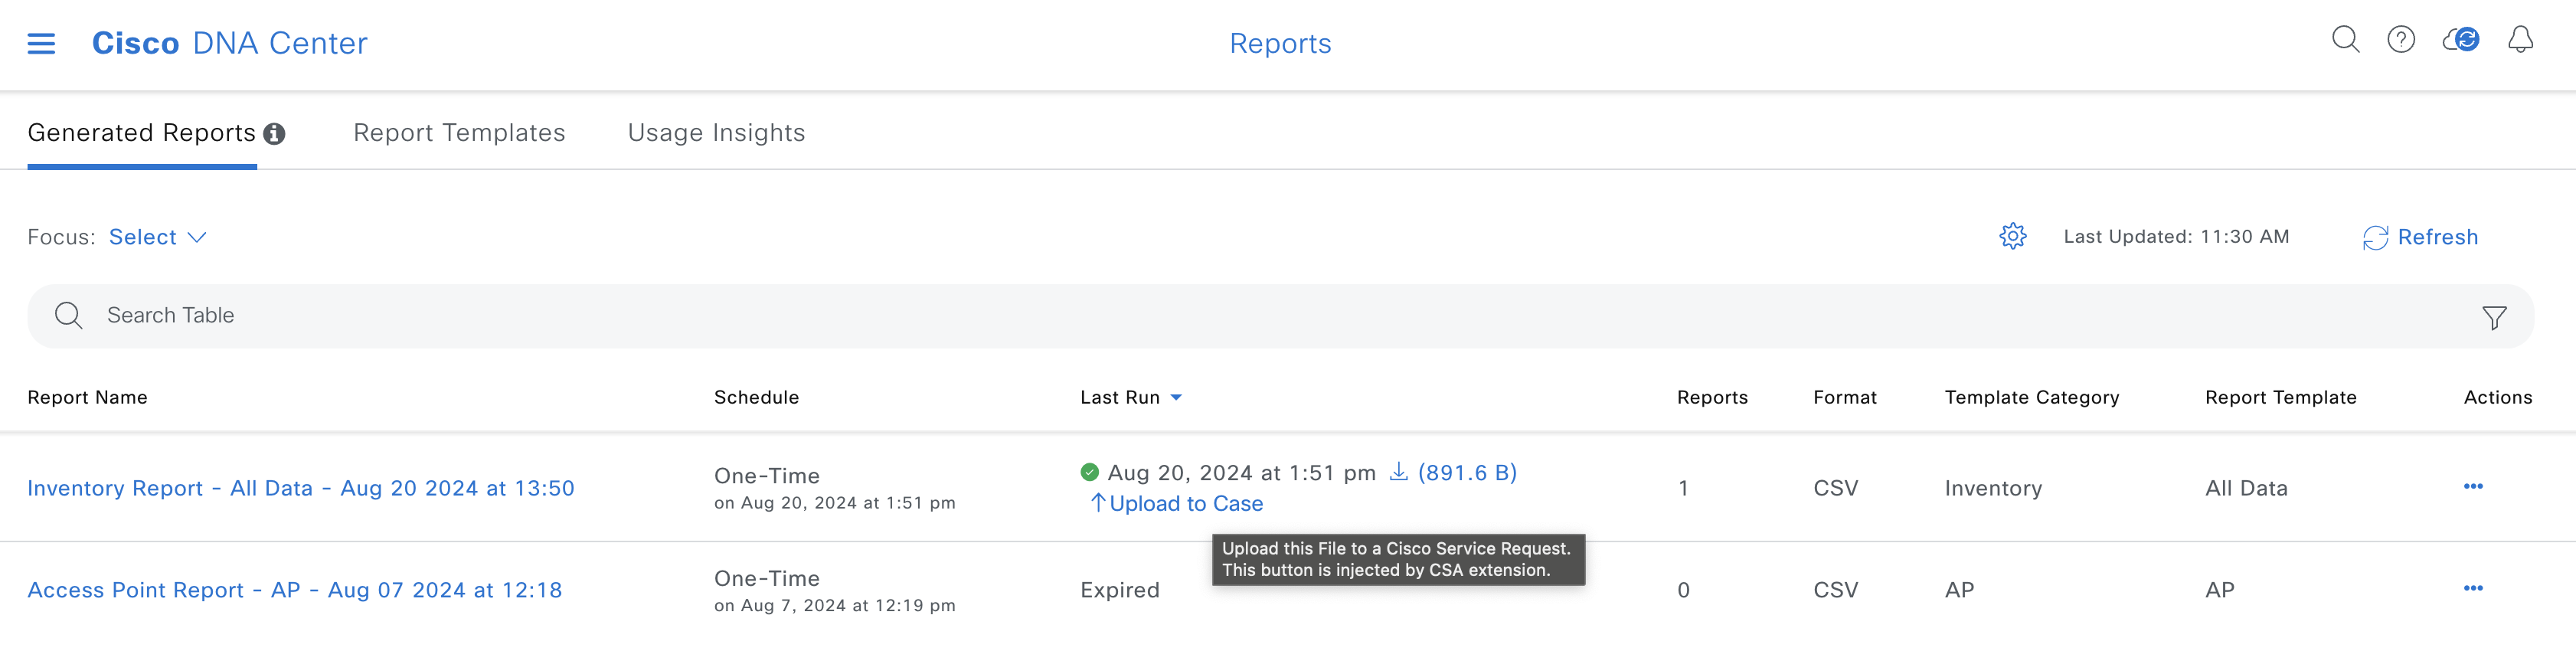
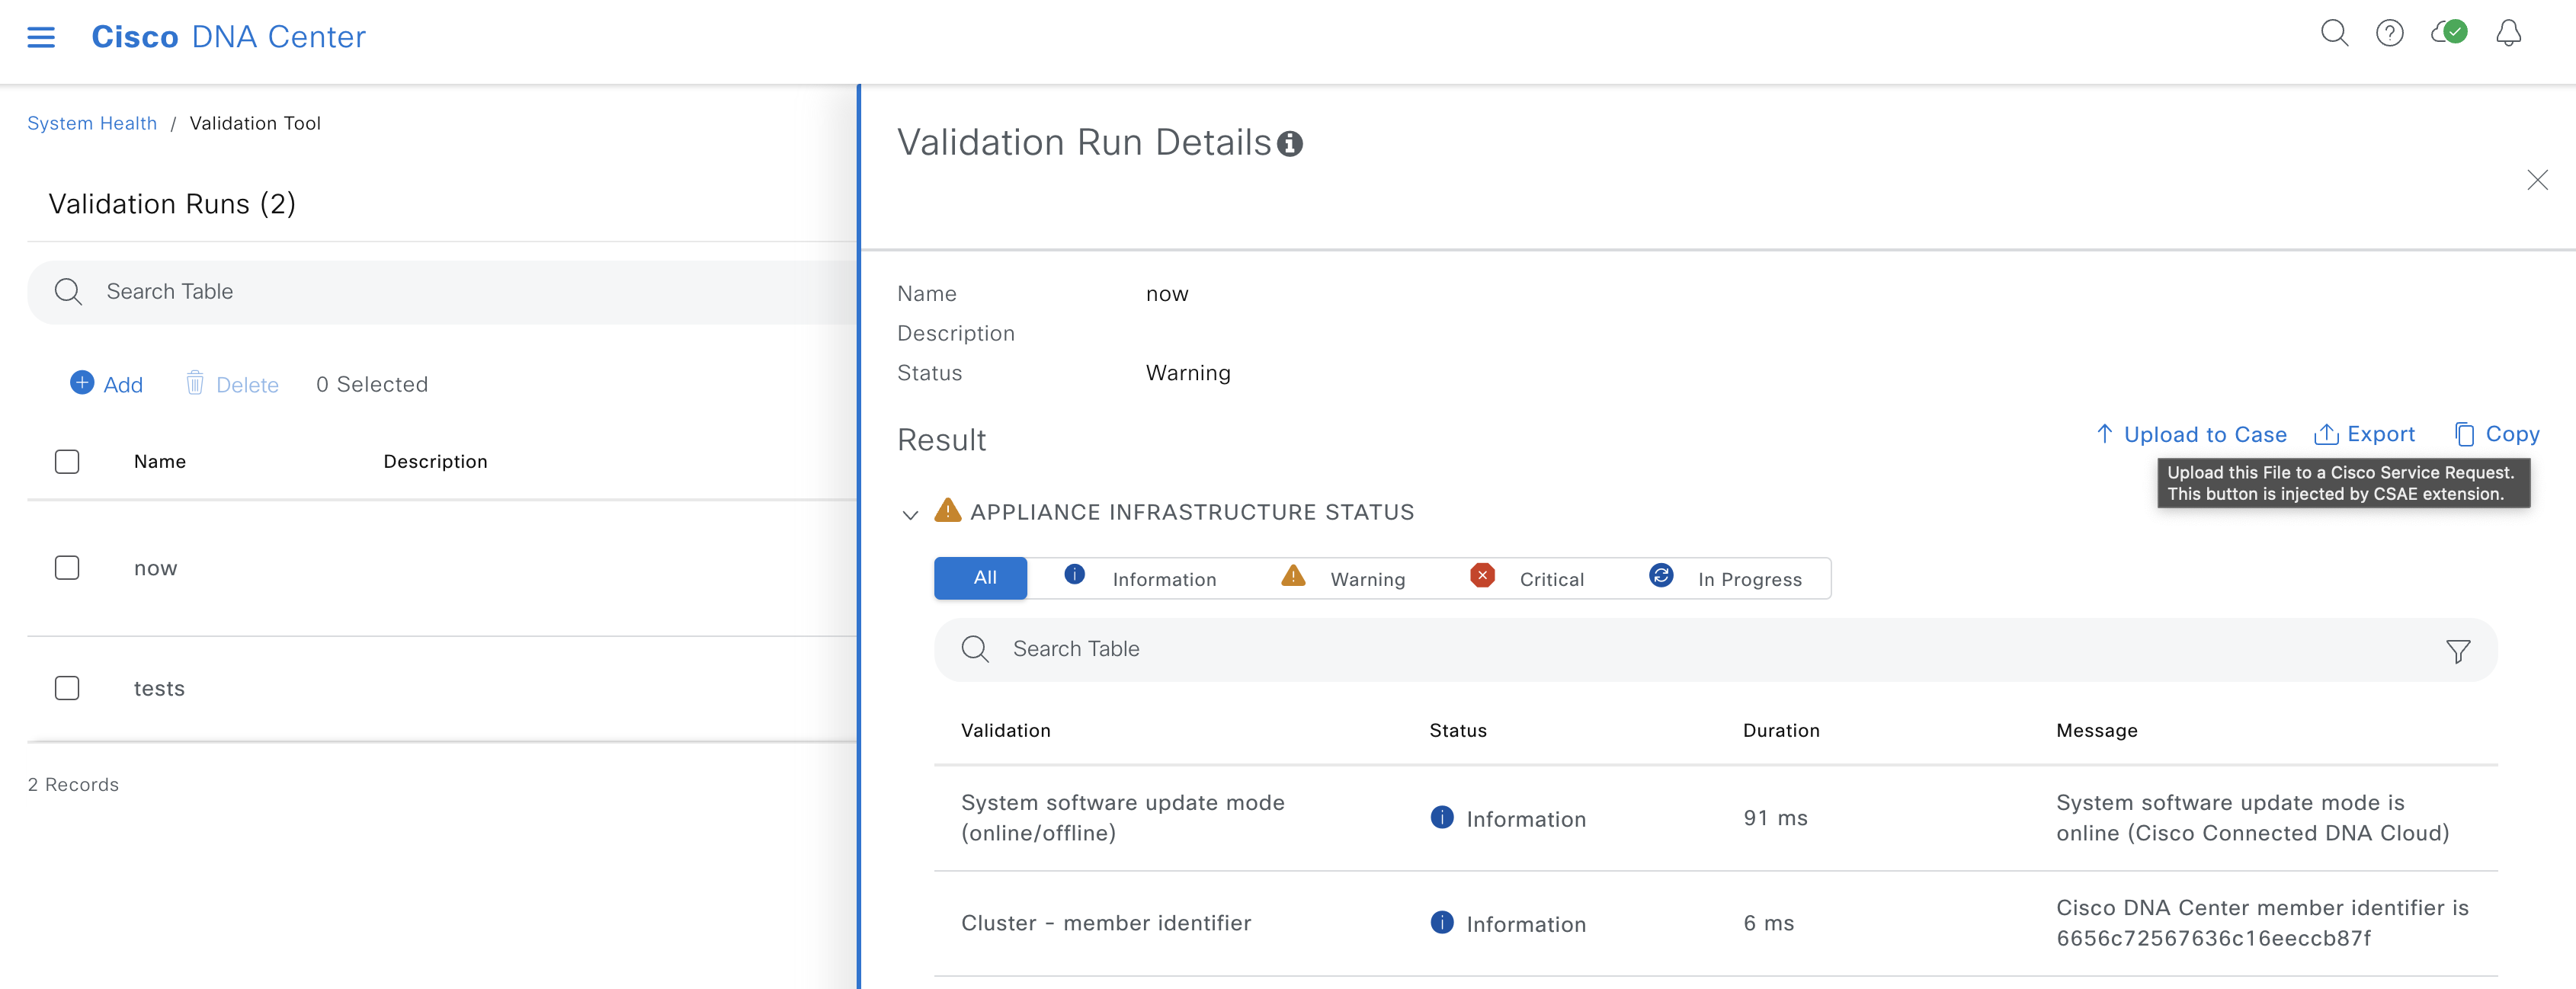
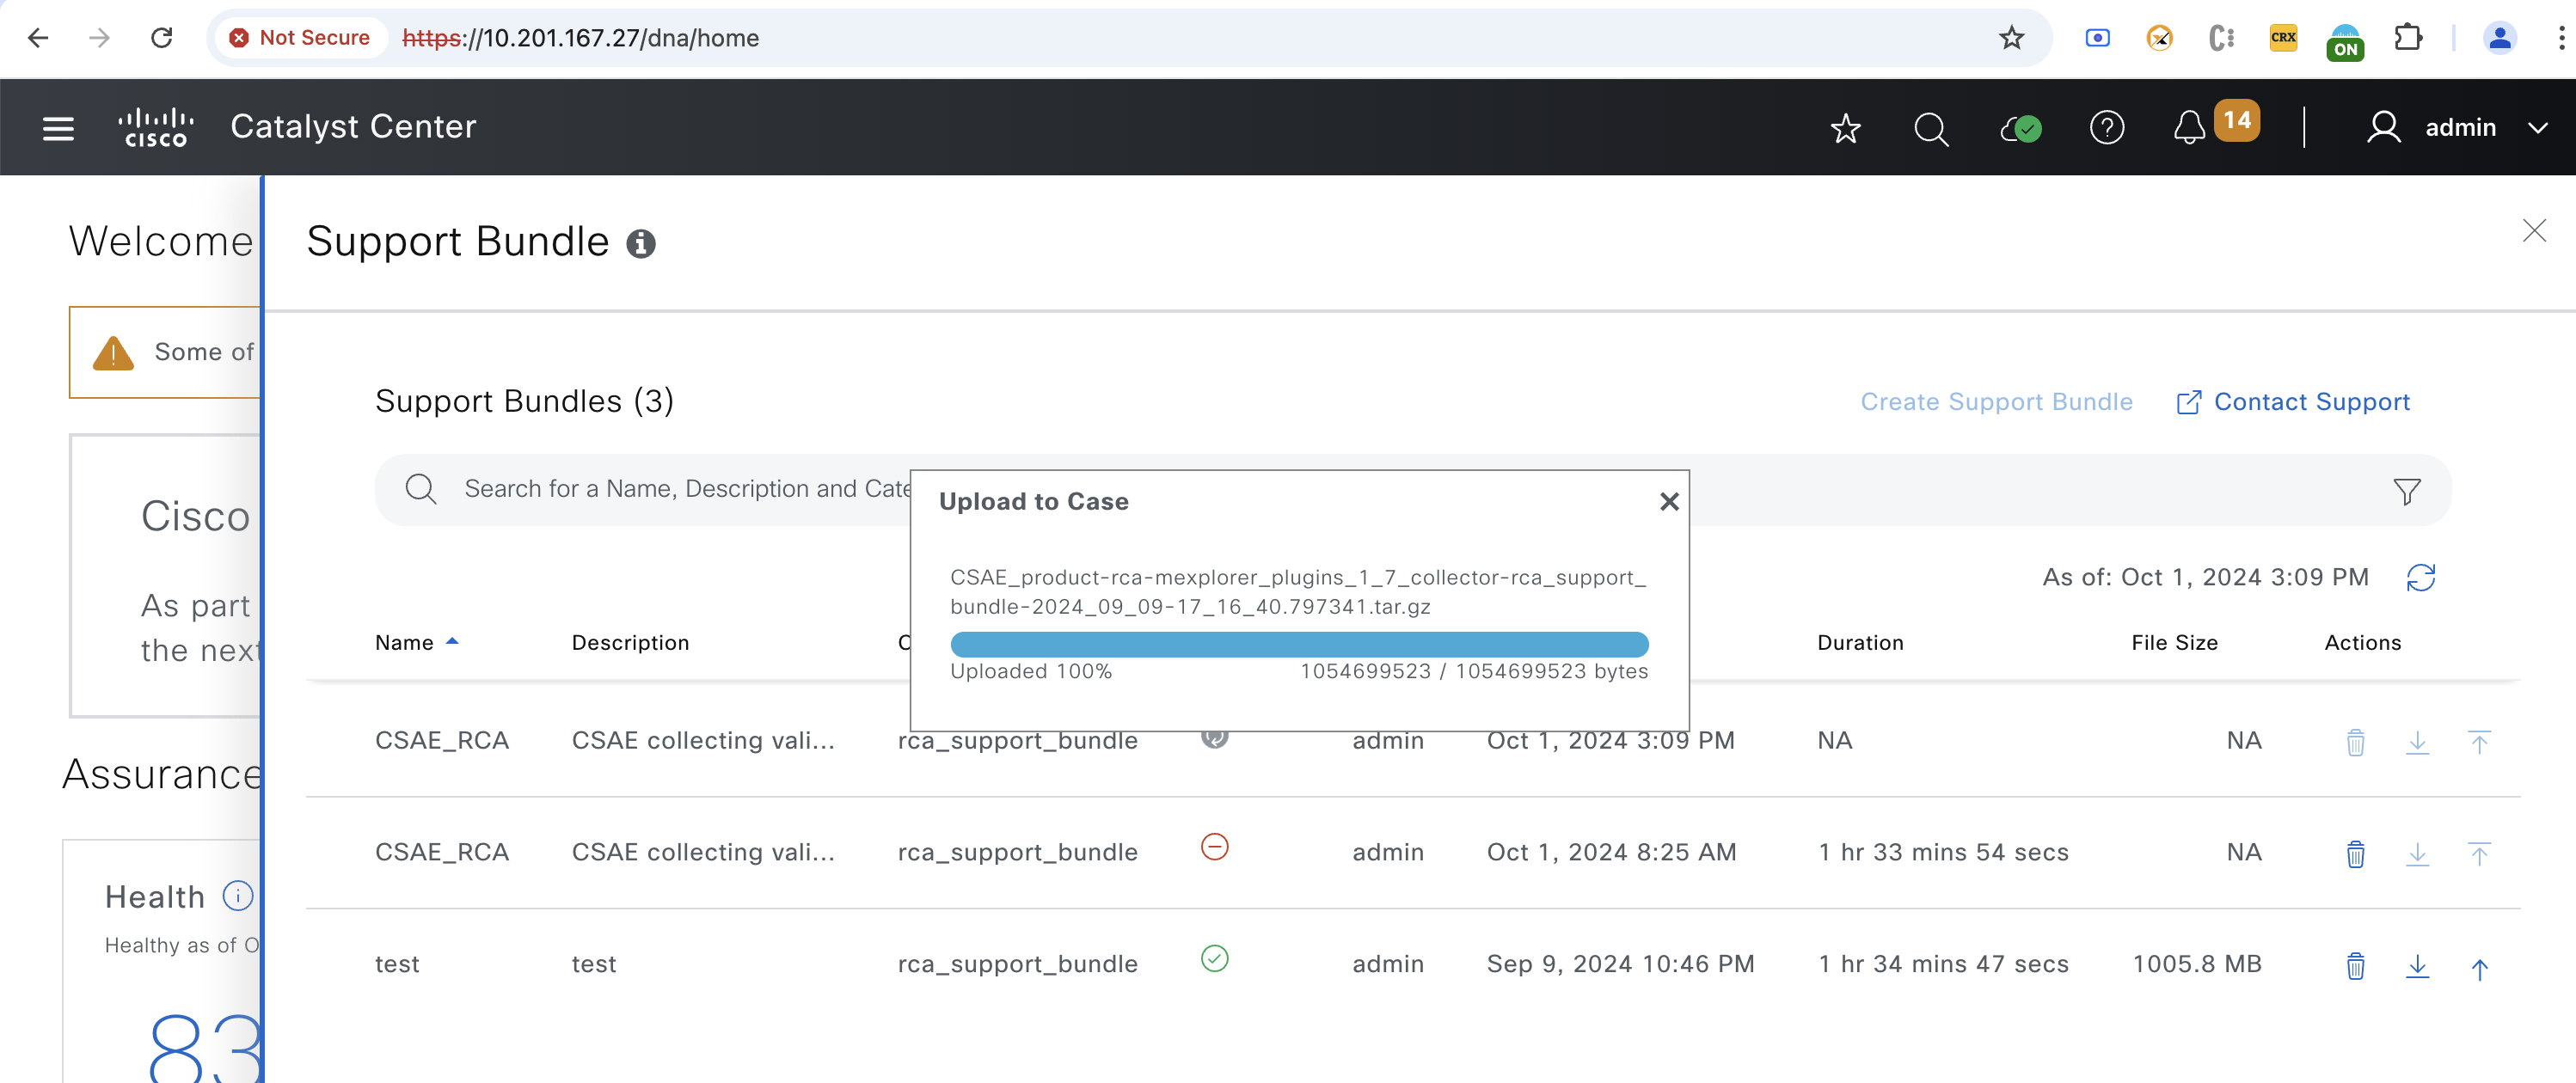
Upload to Cisco Support Case on Catalyst Center
Upload to case has been enabled on several pages on Catalyst Center for directly uploading the data to user’s case.
- Command Runner
The command runner provides the option to capture commands from the devices managed by the Catalyst Center. The captured outputs from all the devices can now be uploaded directly to the case by clicking on 'Upload to Case' in the top right corner.

Direct link to access the command runner tool - https://<CatC_IP_Address>/dna/tools/command-runner
- Reports
Reports that are ready for download can now be uploaded directly to the case by clicking on the 'Upload to Case' button next to the available report.
- Validation Tool
The validation tool performs multiple health, scale, and upgrade readiness checks. A set of checks are selected and executed on demand. The output for these checks is a PDF file listing all the executed checks and the results of these checks. The PDF file can now be uploaded directly to a support case by clicking on the 'Upload to Case' button.
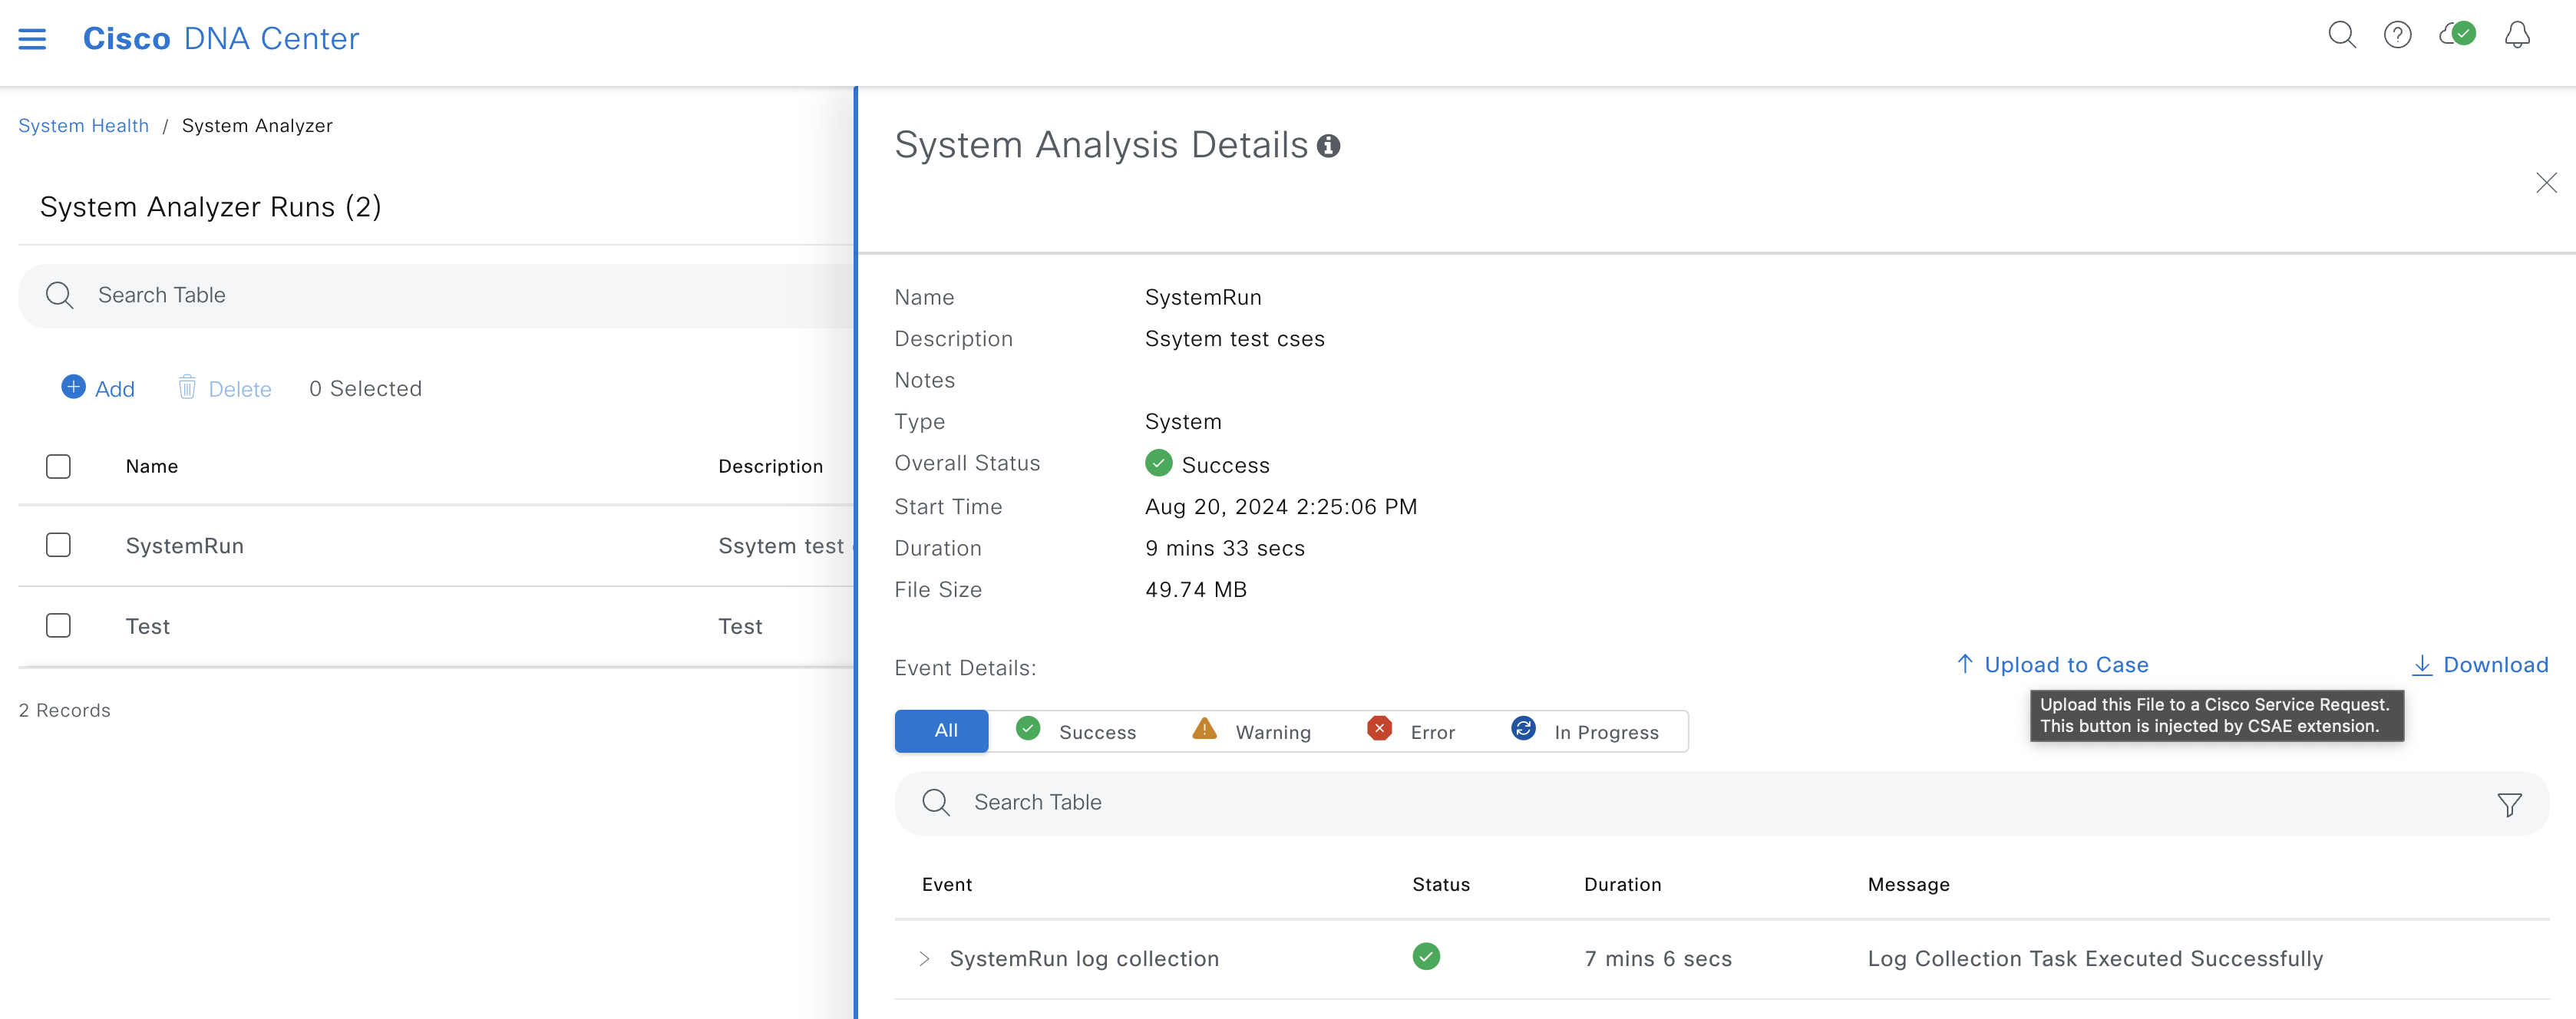
- System Analyzer
The System Analyzer tool generates a tar file of logs required for troubleshooting a specific feature of the Catalyst Center. The tar file can now be uploaded directly to a support case by clicking on the 'Upload to Case' button.
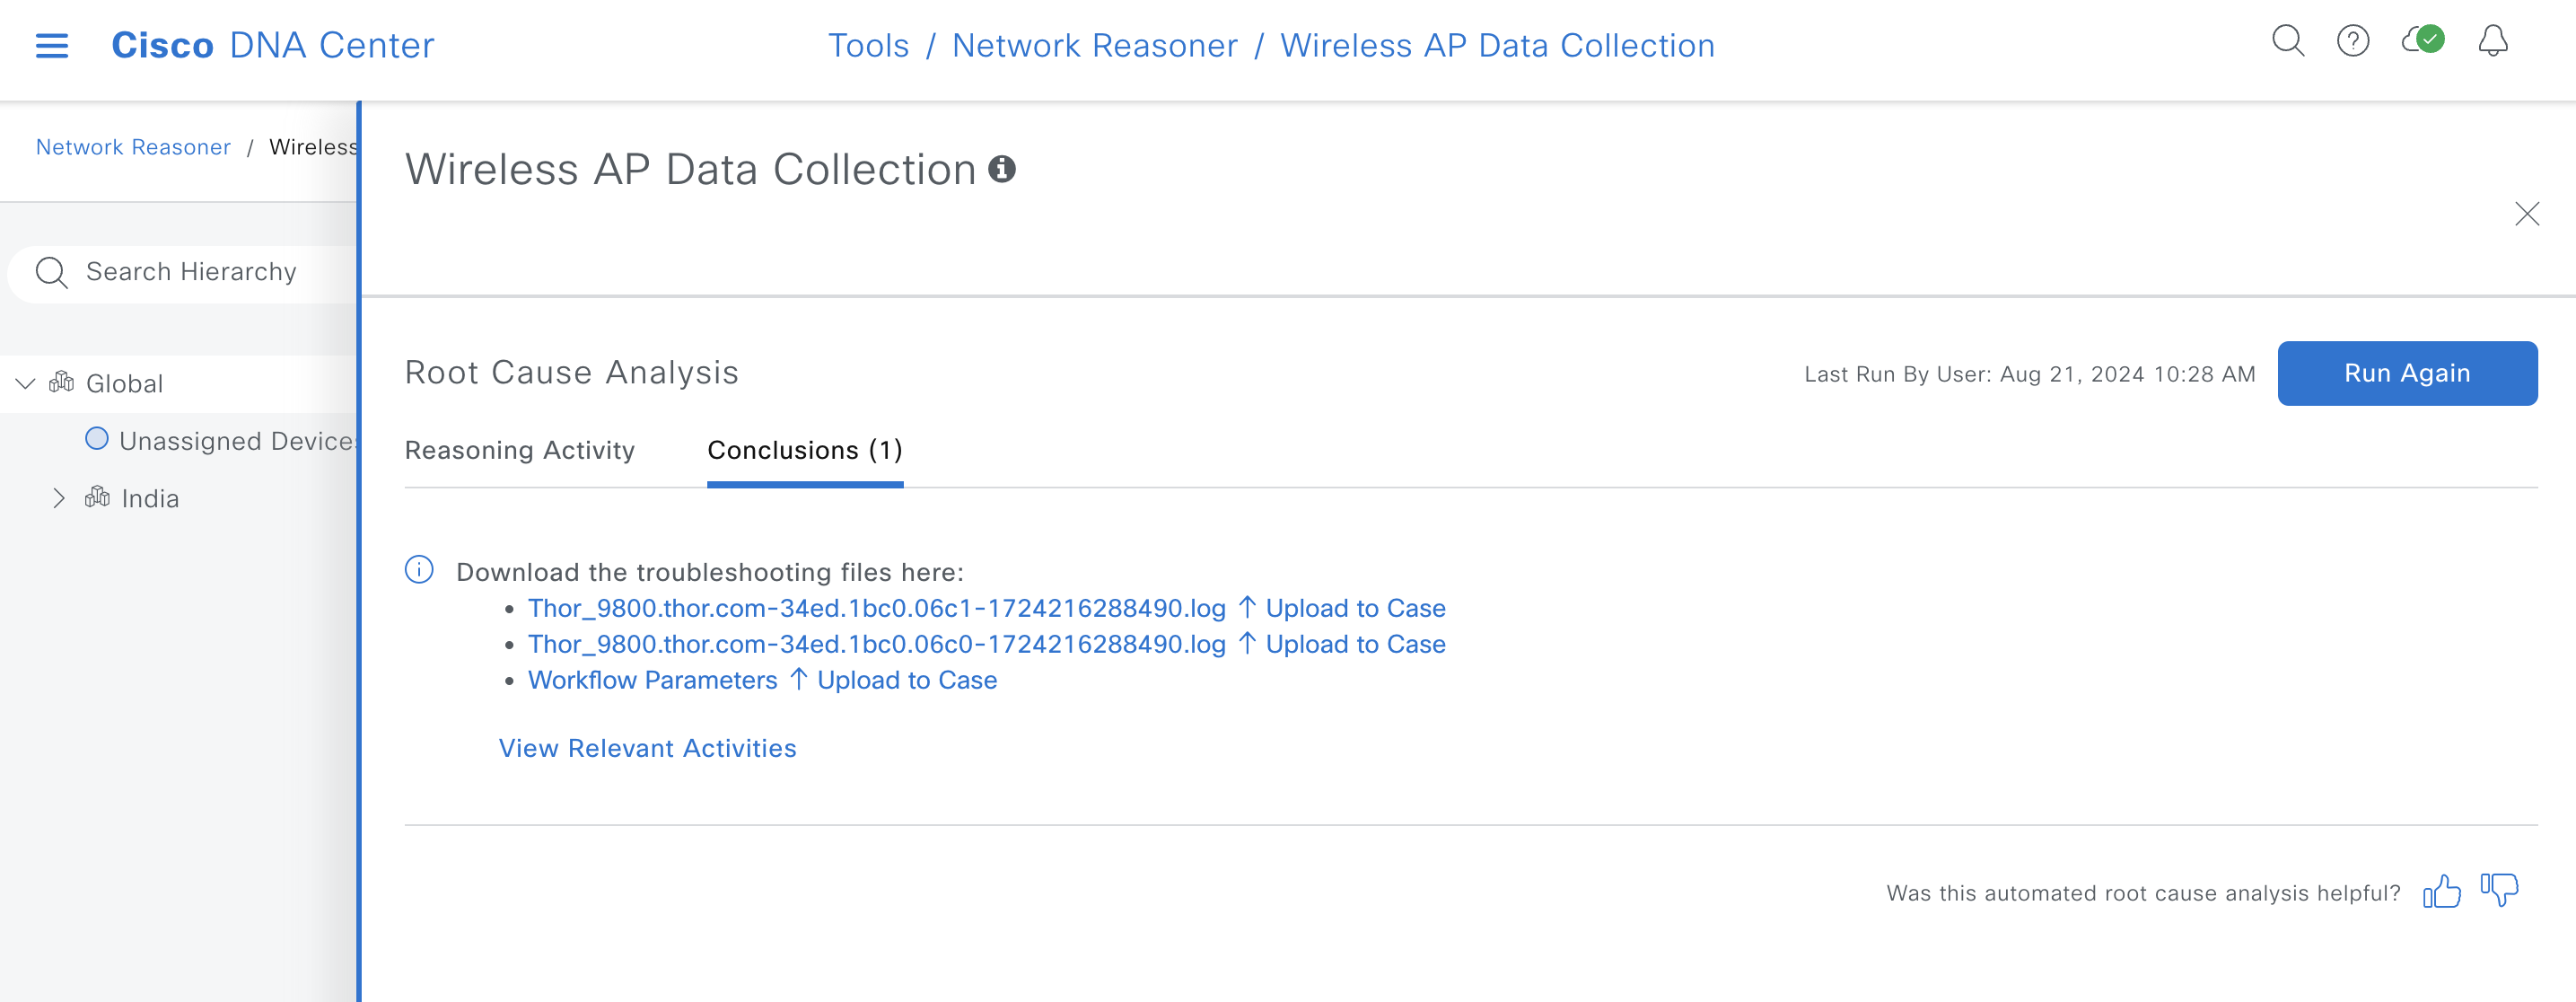
- Network Reasoner - Wireless AP Data Collection
The Wireless AP Data Collection is one of the multiple workflows in the network reasoner or MRE. This workflow collects data required to troubleshoot wireless AP issues in the network. There are multiple files collected, and each file can be uploaded one by one directly to a support case using the 'Upload to Case' button present next to each file.
- Network Reasoner - Wireless Client Data Collection
The Wireless Client Data Collection is one of the multiple workflows in the network reasoner or MRE. This workflow collects data required to troubleshoot wireless client issues in the network. There are multiple files collected, and these files can be uploaded directly to a support case using the 'Upload to Case' button.
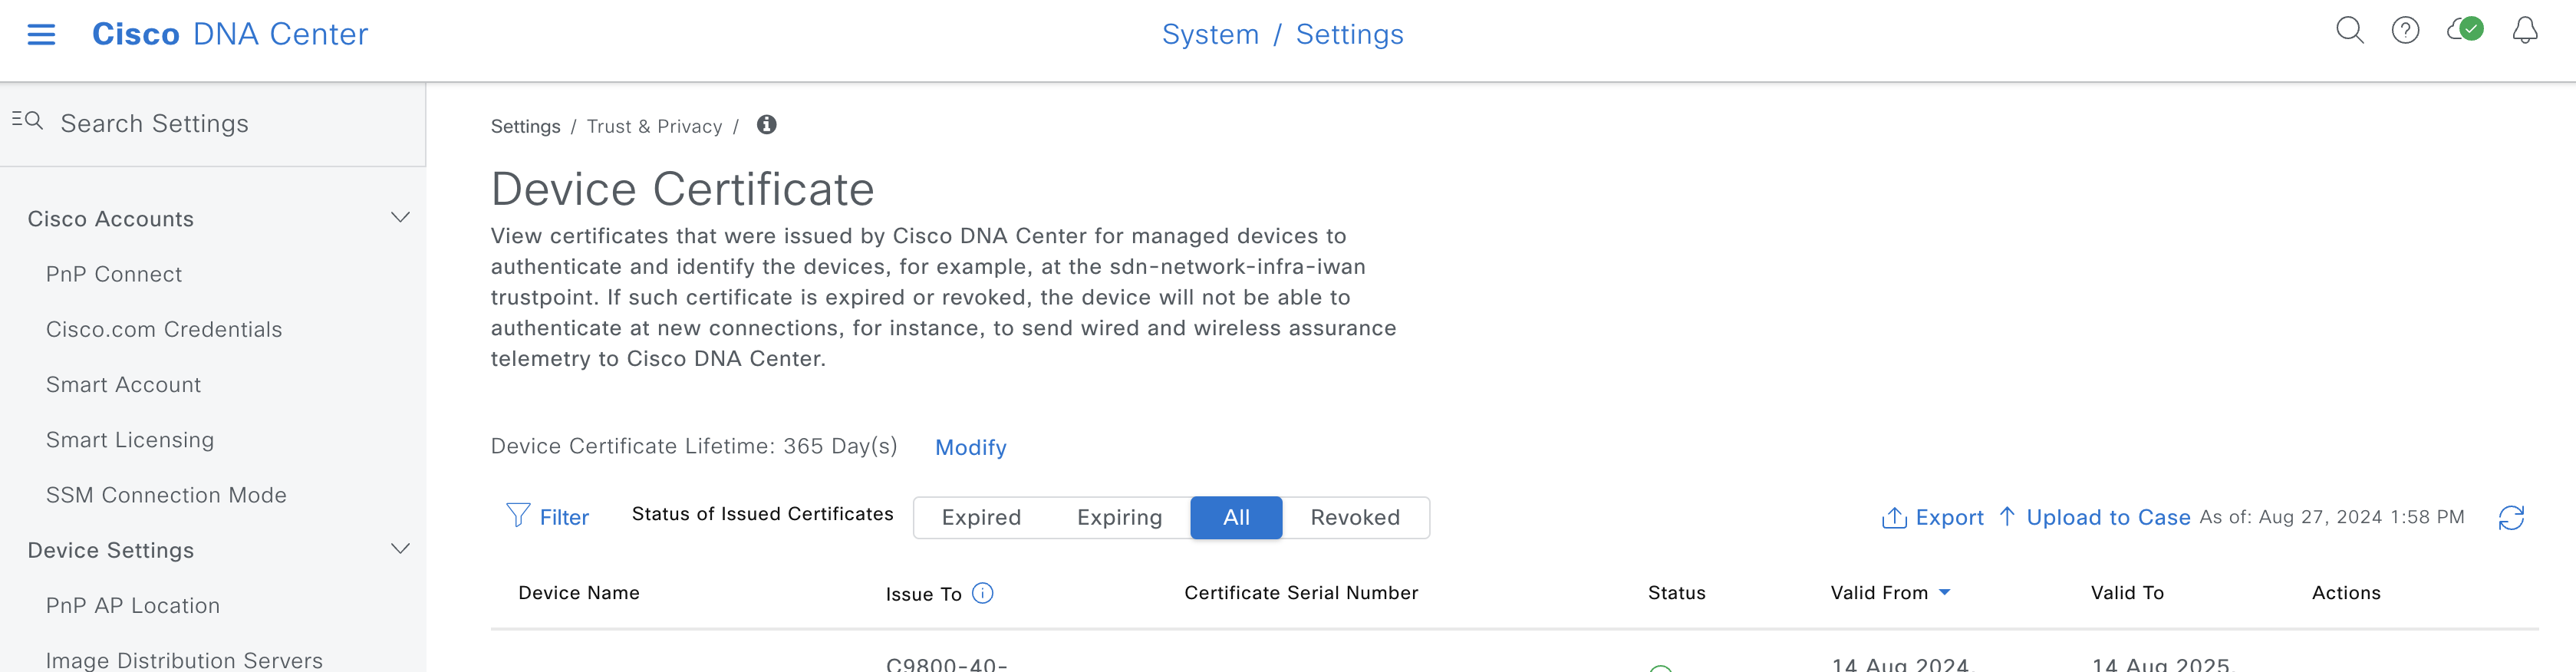
- Device Certificates
The device certificates can be downloaded from the settings page. These certificates can be uploaded directly to a support case using the 'Upload to Case' button.
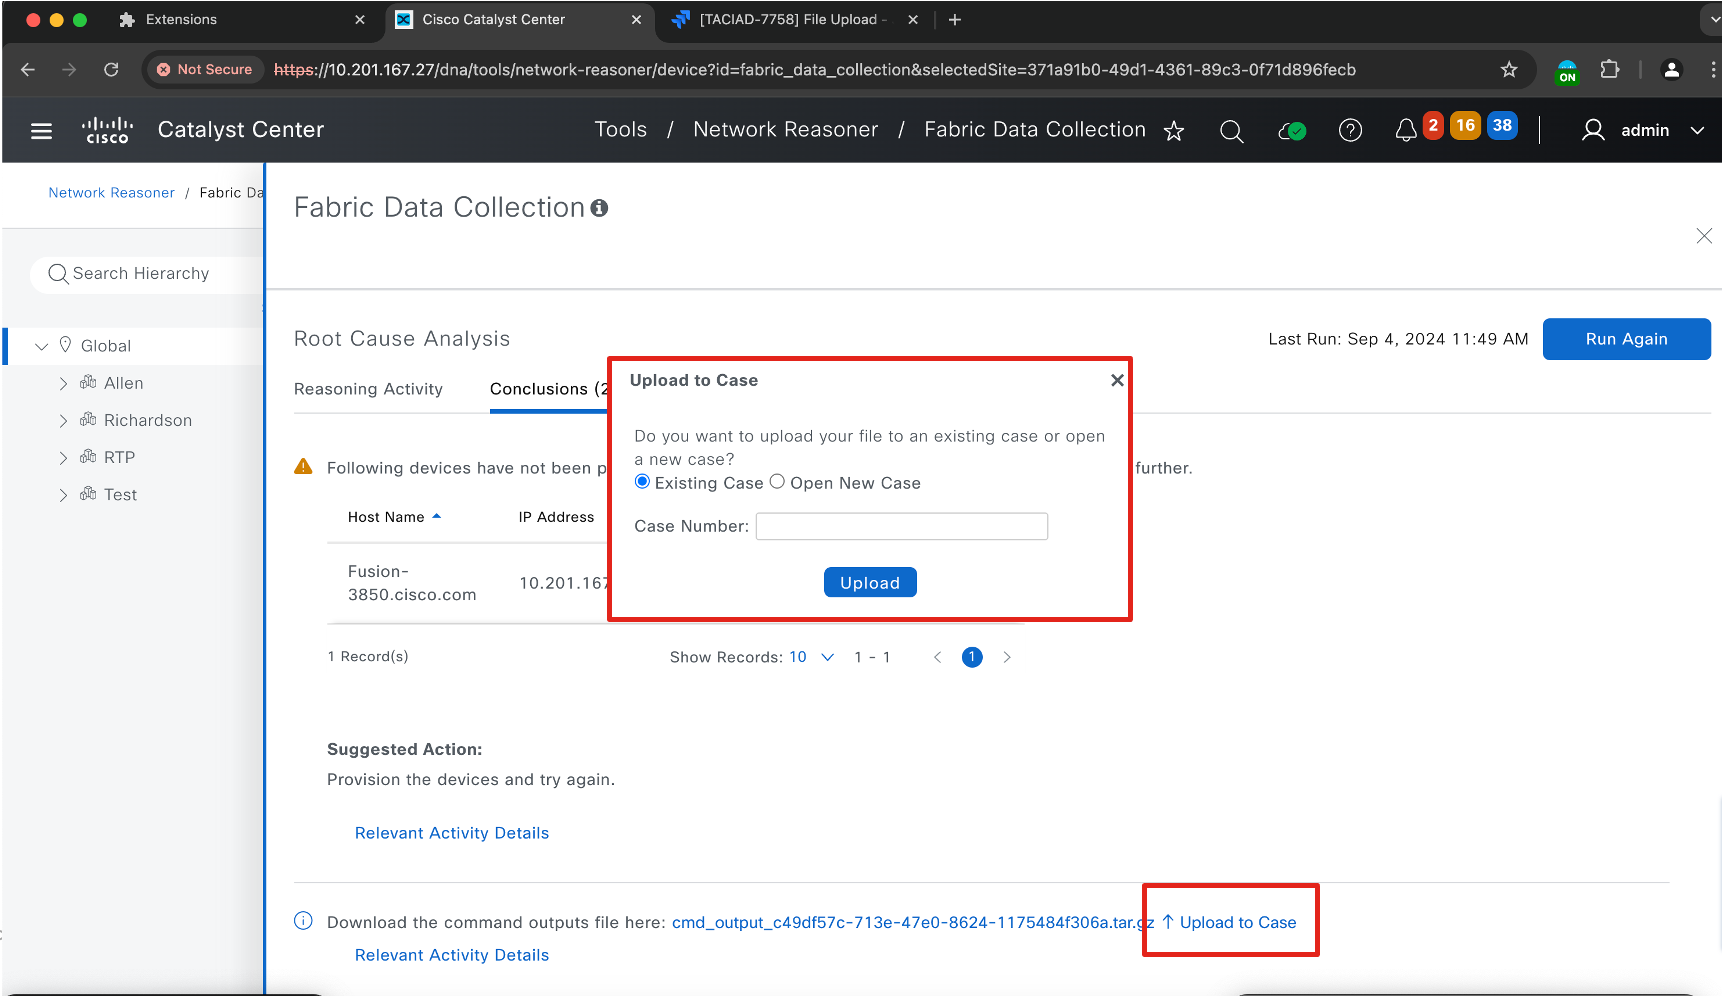
- Network Reasoner - Fabric Data Collection
The Fabric Data Collection feature is a critical tool for gathering detailed information about your network's fabric environment. It facilitates the collection of data required to troubleshoot complex fabric-related issues, ensuring that the right details are available for analysis and support. Go to Tools > Network Reasoner > Fabric Data Collection
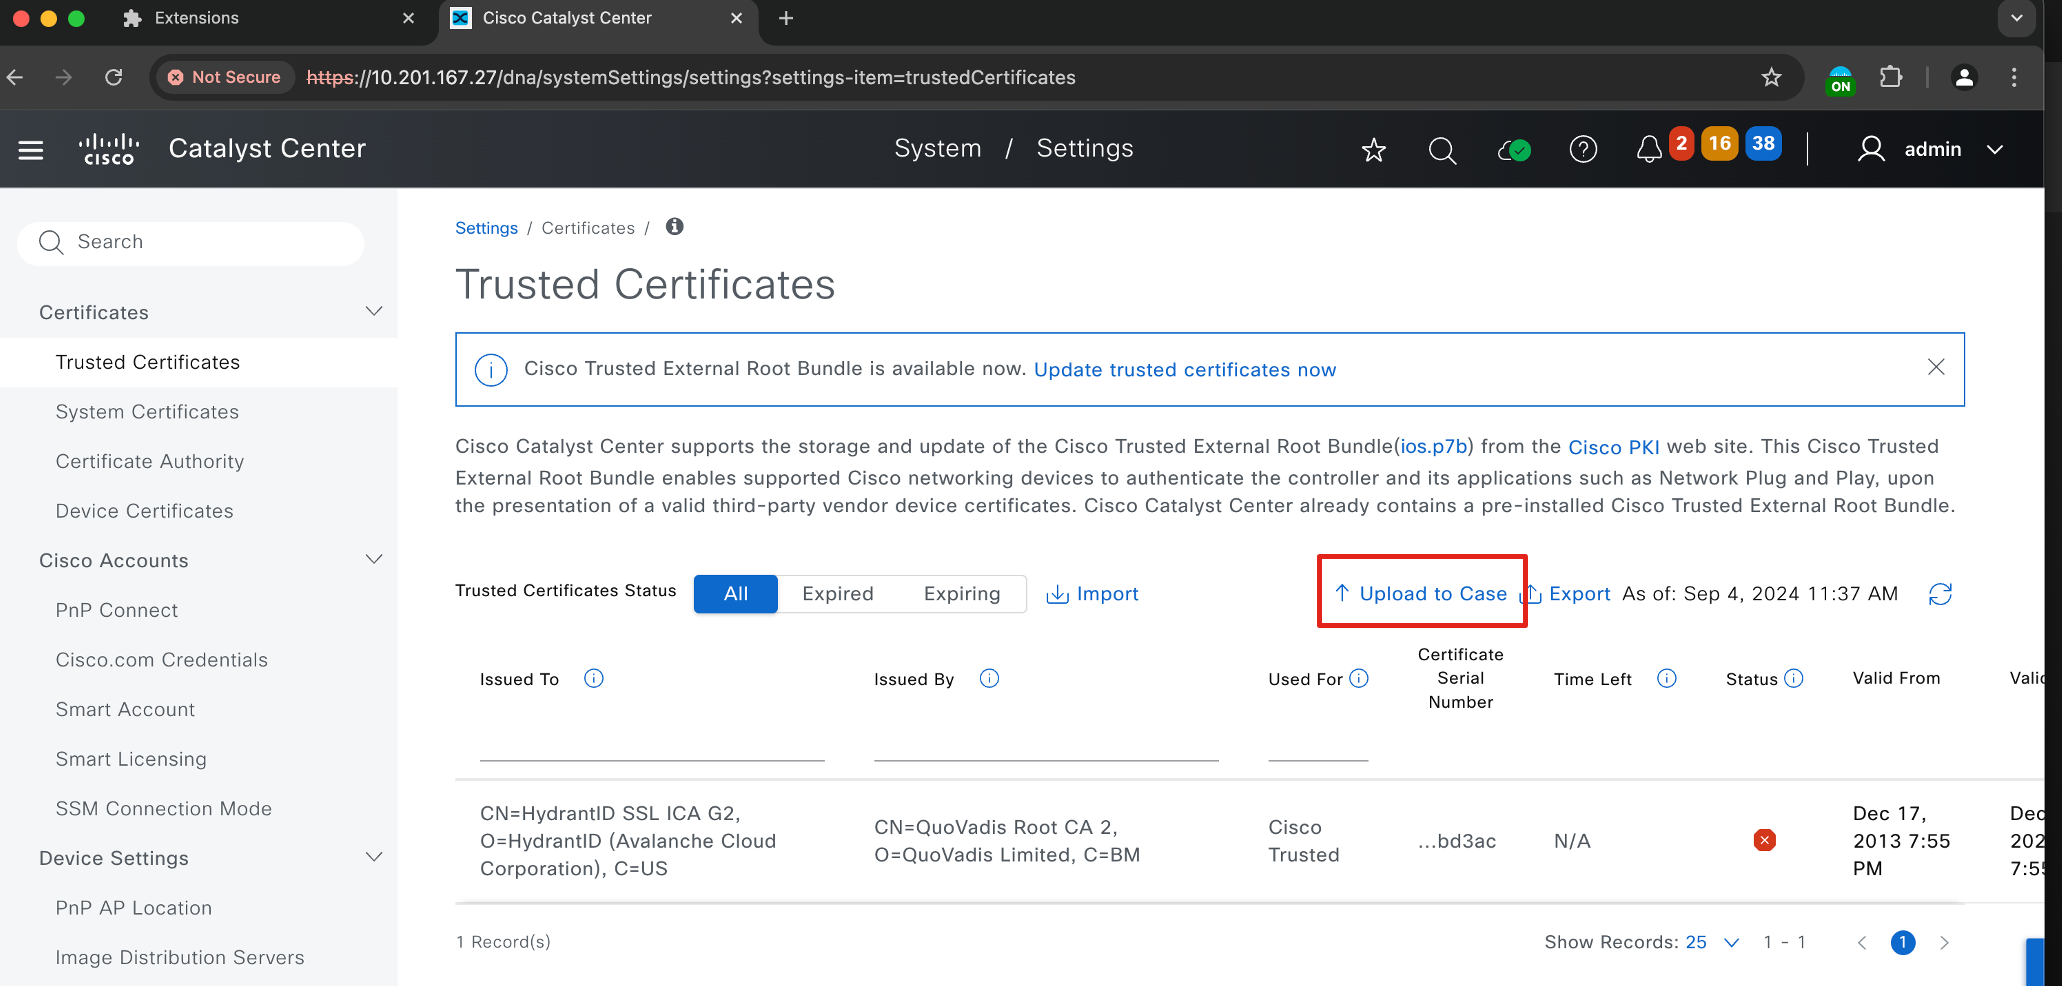
- Setting - Trusted Certificates - 2.3.7 only
In version 2.3.7, the Trusted Certificates setting allows you to manage and configure the certificates trusted by your system for secure communication. Navigate to System > Settings
- RCA Bundle
The RCA (Root Cause Analysis) Bundle is a comprehensive tool or package designed to assist in diagnosing and resolving issues within a network or system environment. It typically includes logs, diagnostic data, and other relevant information to streamline troubleshooting processes.
- Syslog Translation
In Catalyst Center, Syslog Translation simplifies the interpretation of raw syslog messages by converting them into clear, human-readable formats. This feature helps administrators quickly analyze logs, identify issues, and take corrective actions, improving network monitoring and troubleshooting efficiency. Navigate to Assurance> Dashboard> Issues and Events

Summary
This documentation provides a comprehensive guide on how to effectively utilize the Cisco In Product Support with Catalyst Center, streamlining the support process and enhancing user experience.