Use Cases for Catalyst 9800 Series Wireless LAN Controllers
Step 1: Log In
- Log in to the Wireless LAN Controller (WLC).
- The Cisco In Product Support logo appears among the header options on product pages.
- Click on this logo and sign in to Cisco In-Product Support. After successful authentication, you will be able to access and use the features provided by Cisco In Product Support.

The embedded Cisco In Product Support will take a short while to identify and load the relevant functionalities offered on the product.
Click the Cisco In Product Support logo to open a popup window displaying the fully accessible services offered by Cisco In Product Support on the product.
At this point, the features on the supported product can be utilized.
Step 2: Using the In-Product Support features
A. Opening a Cisco support case
-
Open Cisco In Product Support: Click on the Cisco In product Support icon located in WLC's header interface.
-
Select 'Open Support Case': In Cisco In Product Support interface, choose the option to open a new support case, which will guide you through the necessary steps.

- Submit Case: Fill in the required details, such as the case title, issue description, and upload diagnostics, and submit your support case through Cisco In Product Support interface.

- Complete Case Creation: After submission, follow the on‑screen instructions. You will be redirected to Support Case Manager, where you must complete all required details to successfully open the case.

B. Recording Your Screen
- Start Recording: Click Record Screen, within the Cisco In product Support icon in WLC's header interface.
- Begin Recording: Follow the on-screen instructions to start the screen recording, capturing all relevant actions and information.

- Microphone Permission: Optionally, allow the In product support to access your microphone to provide an audio explanation of your issue, enhancing the clarity of your recording.
- Add Screenshots: During the recording, you can double-click any screen to add a screenshot, which will be included in the support case along with the video recording.

- Choose Recording Area: You will be prompted to select whether you want to record a specific Chrome tab, the entire browser window, or your entire desktop screen.

- Stop Recording: To stop the recording, click the "Stop" option on your screen.
- Upload Recording: Once the recording is stopped, you will have the option to upload the video to an existing case by entering the nine-digit Cisco Support Case number or open a new case.

Click the Upload button and wait for the file to upload successfully. Closing the dialog before the upload completes will stop the process.

Once the file is uploaded, a successful upload message is displayed on the screen.

If you do not have permission to view or access case information, the upload will fail and an unsuccessful upload message will be shown.

C. Upload Local File to Case
- Upload File: Click 'Upload Files to Case' in the embed interface.

- Choose File: In the modal that pops up, click 'Choose file' and browse through your local files to upload the preferred file.
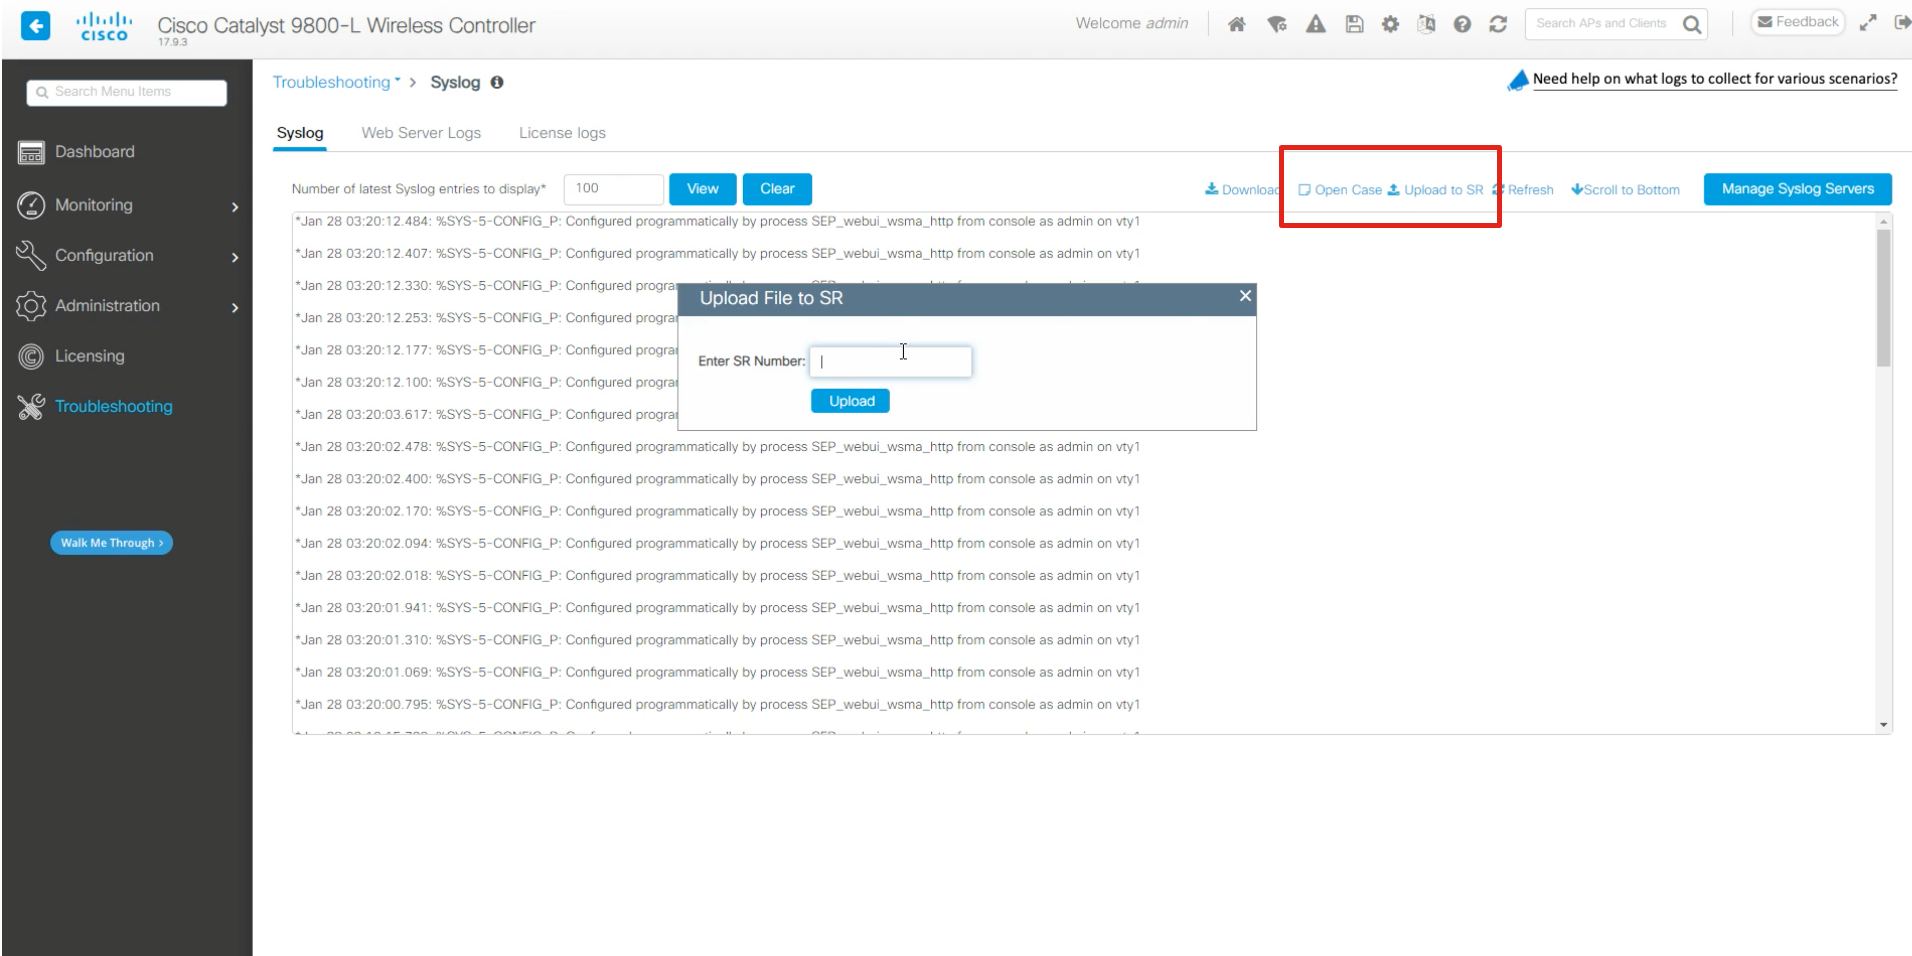
- Select case: Enter an existing Cisco Support Case number or choose from the case dropdown. Otherwise, create a new case to upload your file.

- Case Number Search: Conveniently, you can also enter a case number to search from a list of existing cases.
- Upload Confirmation: After clicking 'Upload,' allow a moment for your file to be added to the case. You will receive a confirmation prompt once your file has been successfully uploaded. Additionally, you have the option to cancel the upload while it is in progress.
Allowed File Types: Allowed file extensions include jpg, png, mp4, and zip files. If .pkg or .exe files are uploaded, the pop-up will prompt an error message.
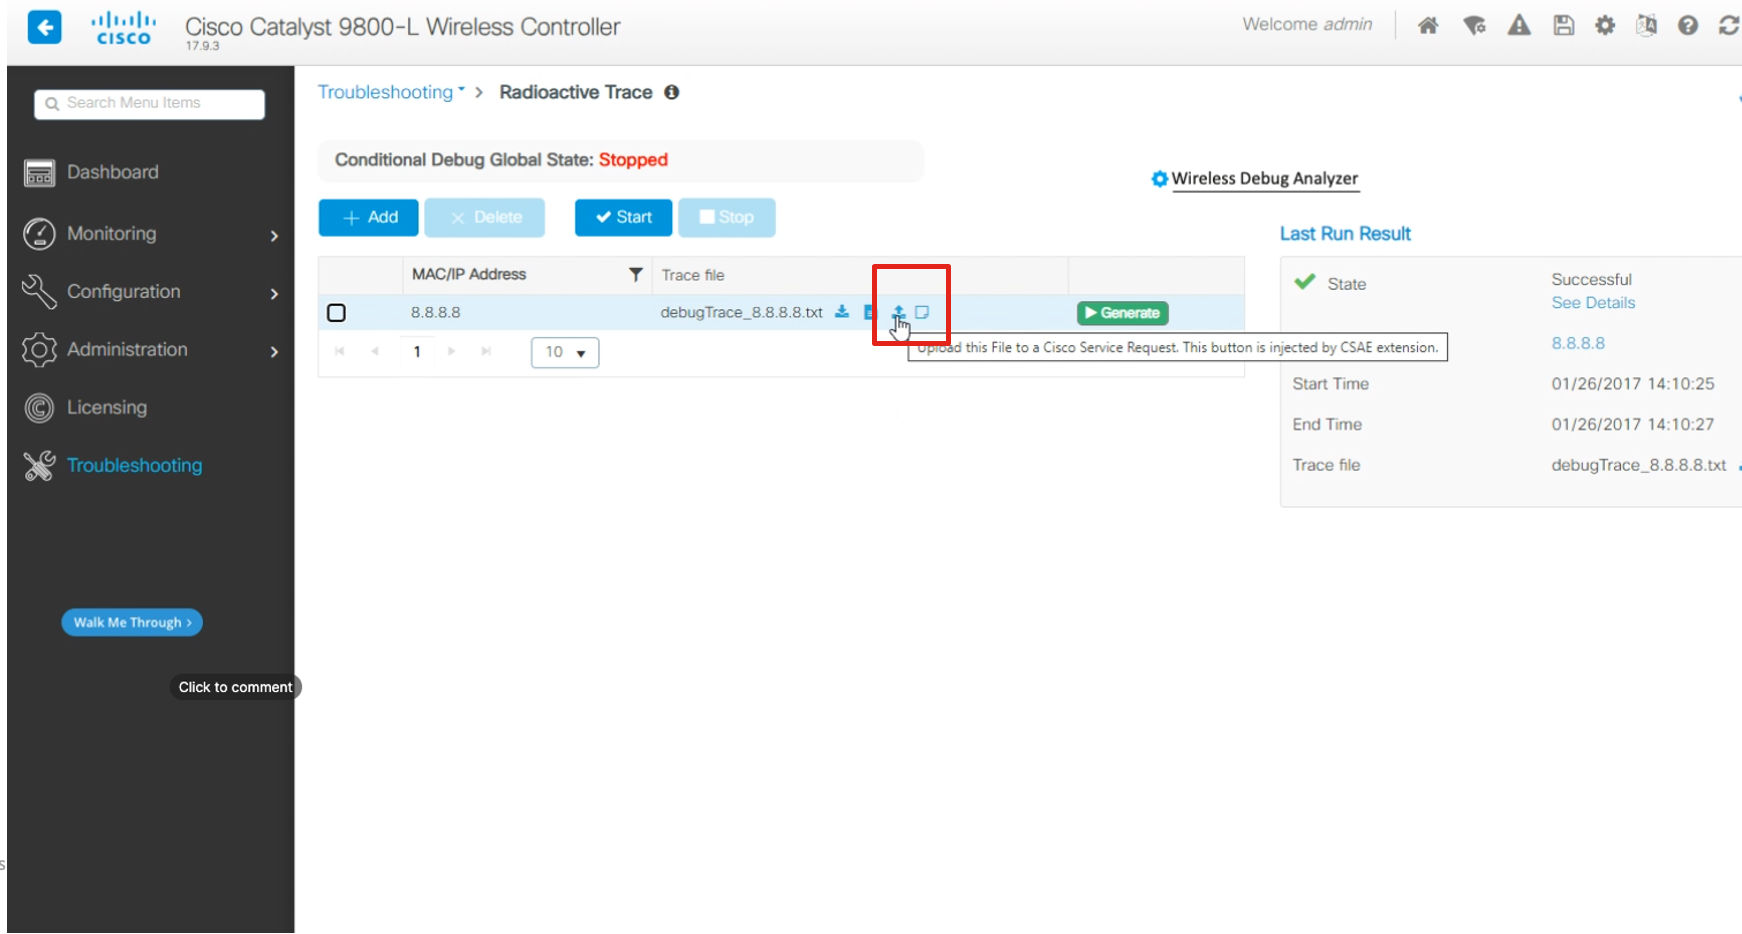
Usage for Custom Case Open
- Navigate to Troubleshooting > Radioactive Trace
- Navigate to Troubleshooting > Syslog
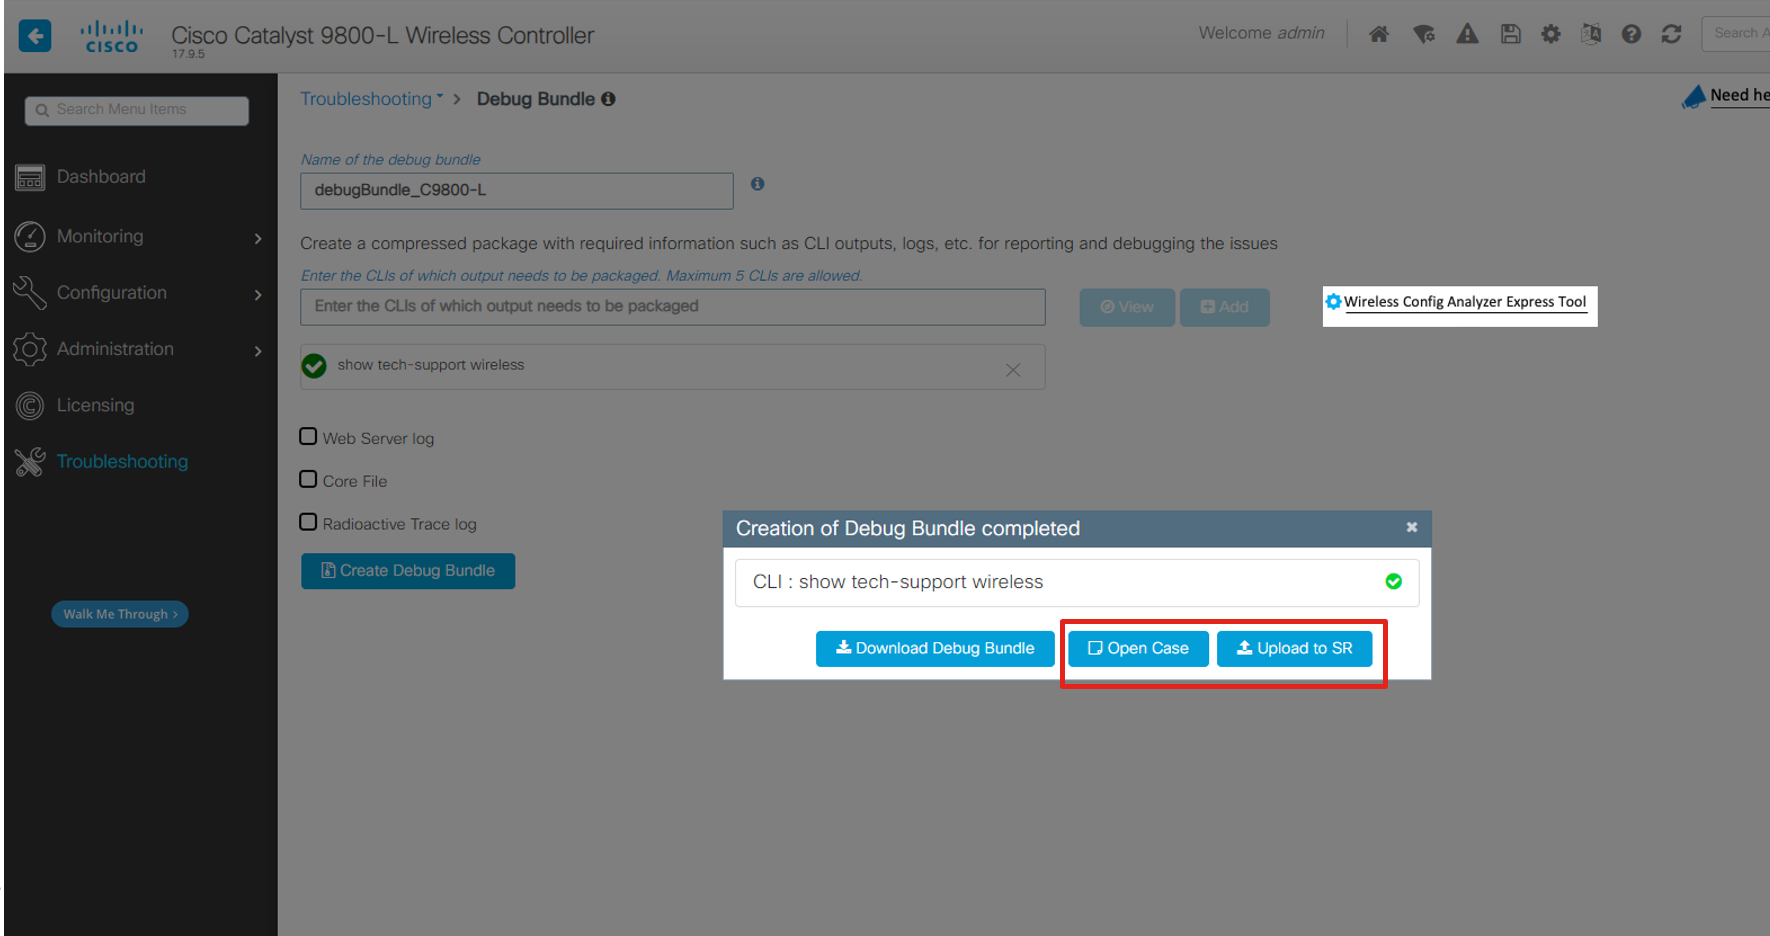
- Navigate to Troubleshooting > Debug Bundle
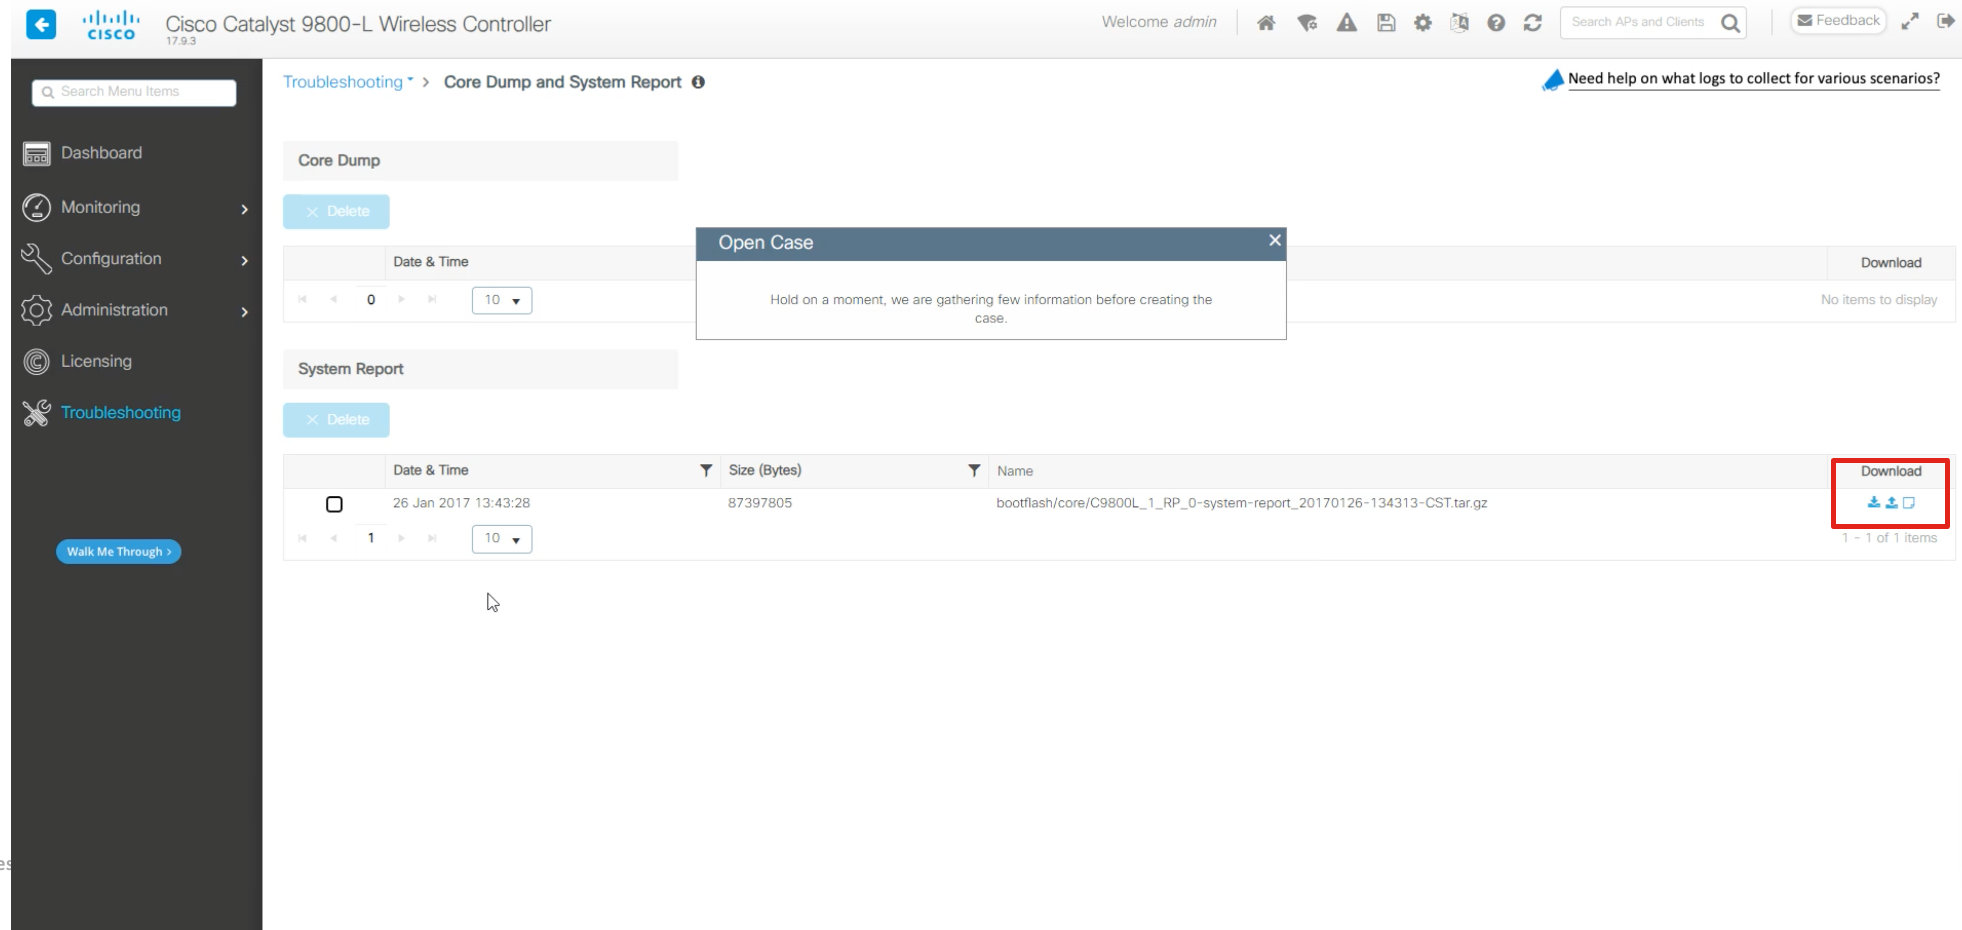
- Navigate to Troubleshooting > Core Dump and System Report
- Navigate to Administration > Management > File Manager
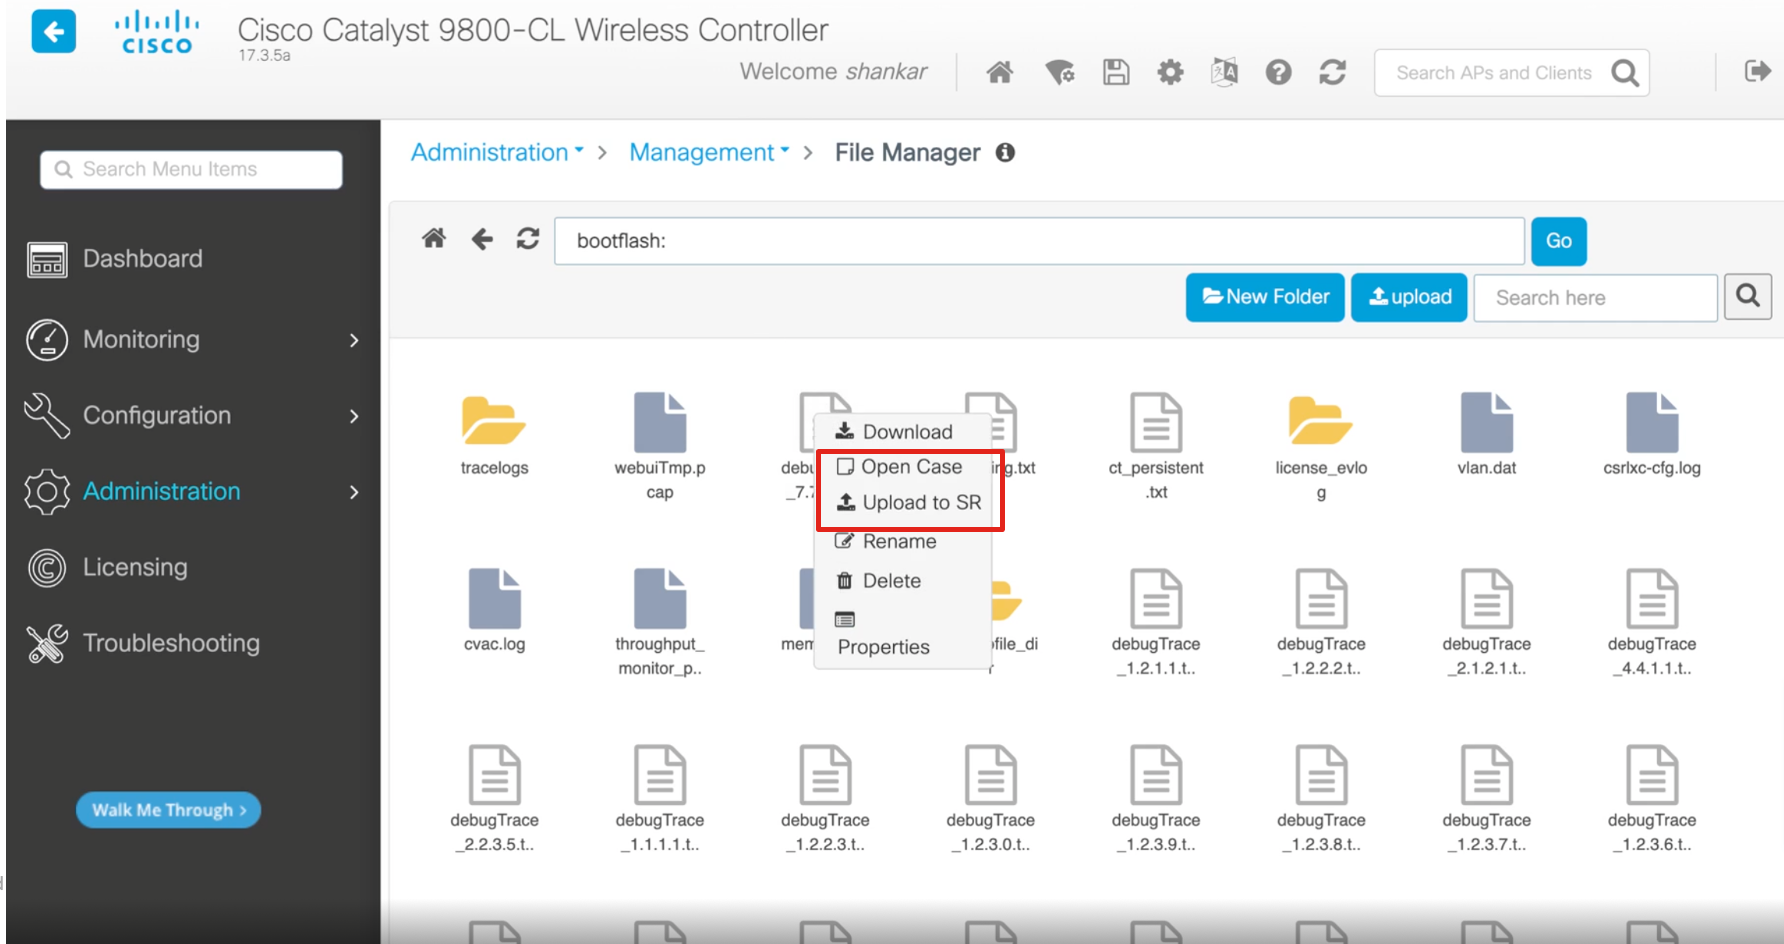
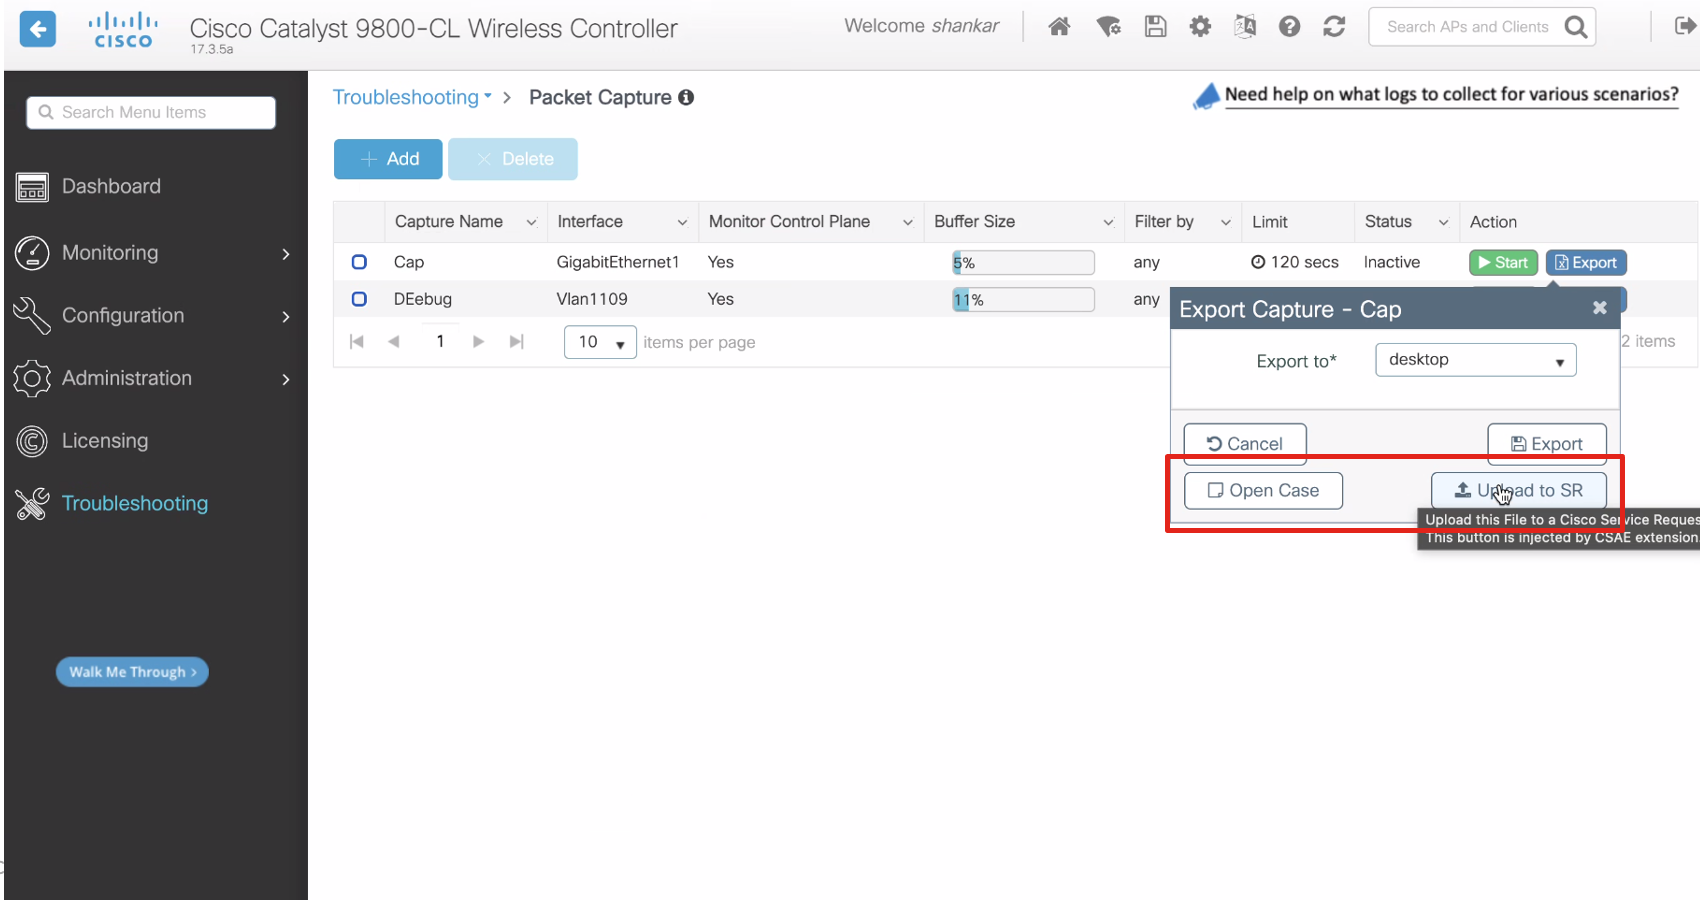
- Navigate to Troubleshooting > Packet Capture
- Navigate to Administration > Command Line Interface

Smart Tips within Portal
- Smart Tooltips: Smart tooltips dynamically attach to elements of the WLC to provide helpful hints, links to YouTube videos, or information about programs like the Collecting Logs and Debug Bundle on Catalyst 9800 Wireless Controller.
- Example: In the WLC troubleshooting page, tooltips may highlight steps on collecting logs and debug bundles.

TAC Point of Presence Widget
- Digital Self-Guided Support: An in-app widget (TAC Point of Presence) enables you to obtain digital self-guided support. By analyzing the content on the current page or generating additional context through user queries and responses, the Cisco In Product Support can:
- Proactively offer alerts.
- Identify vulnerabilities.
- Suggest relevant articles related to your current configuration efforts.
Example Usage
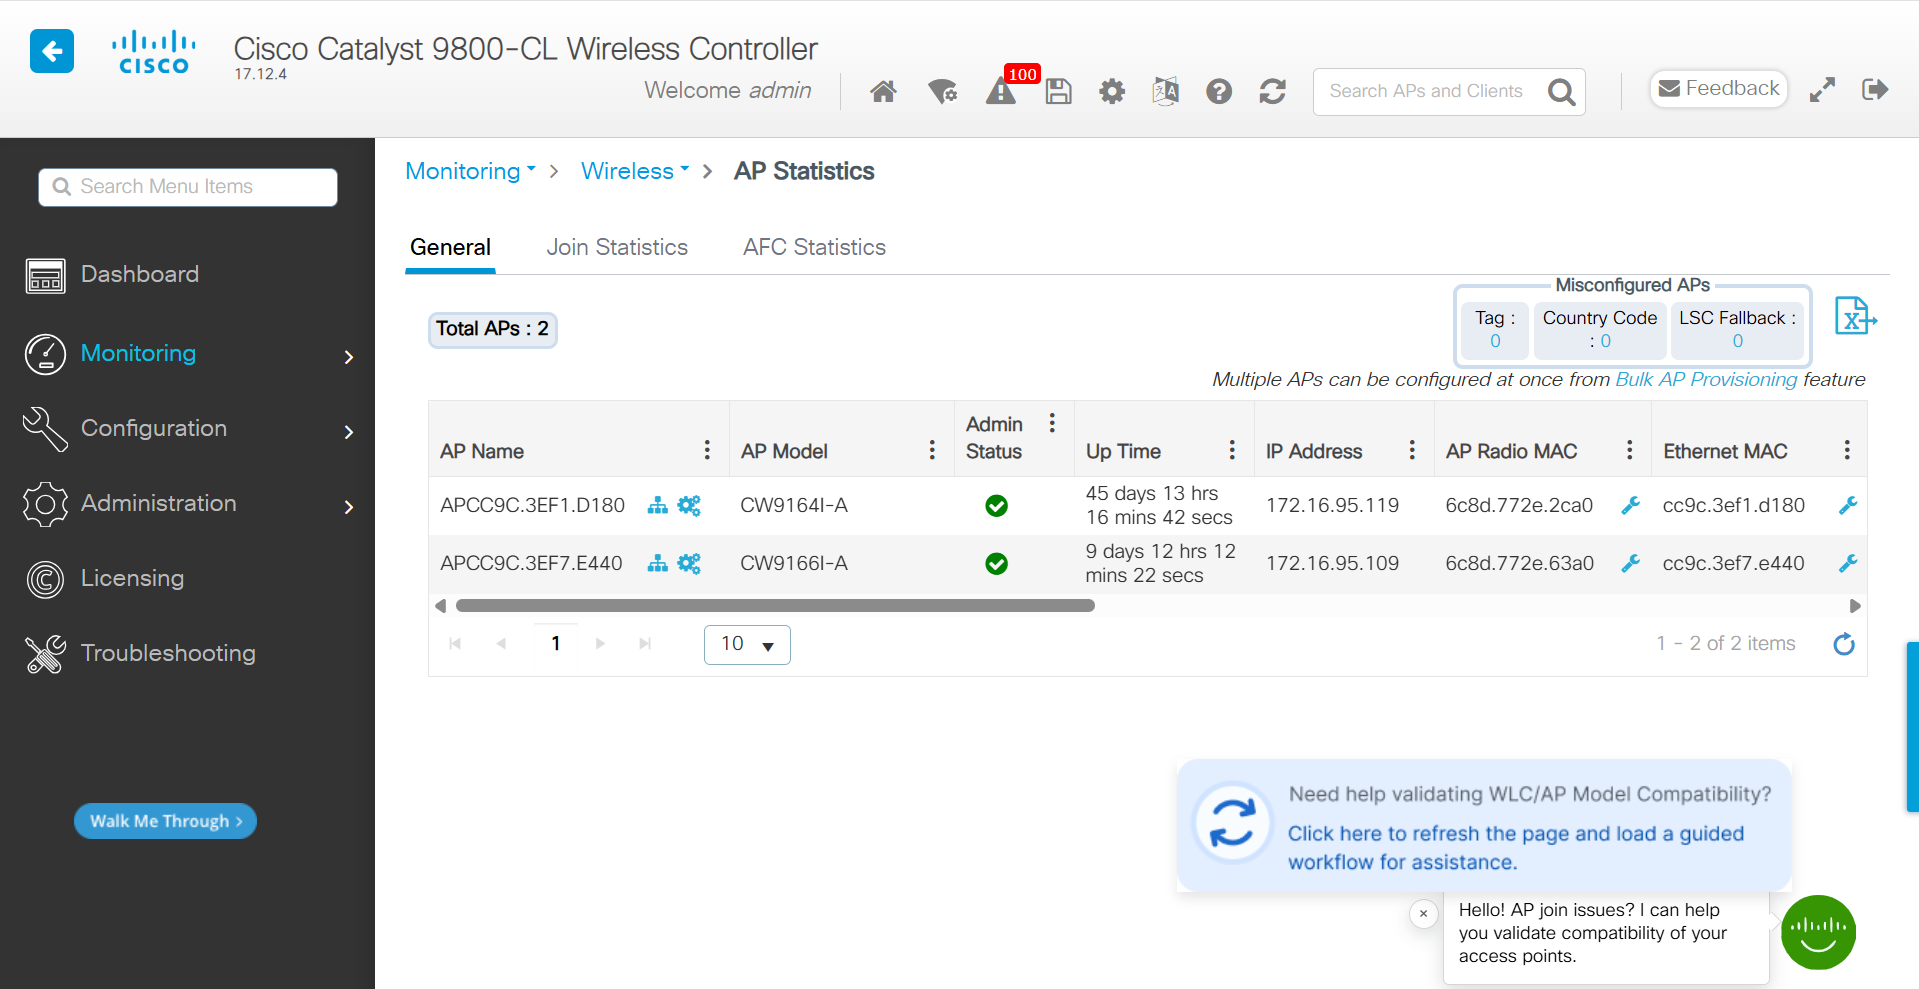
- AP Statistics Page: When navigating to the AP Statistics page on the Cisco Catalyst 9800-CL Wireless Controller (Monitoring > Wireless > AP Statistics), the widget can:
-
Identify potential access point issues.
-
Assist in validating the compatibility of your access points.
-
Detect the content on the viewed page and recommend further steps for validating WLC/AP model compatibility after users select the desired WLC/AP models.
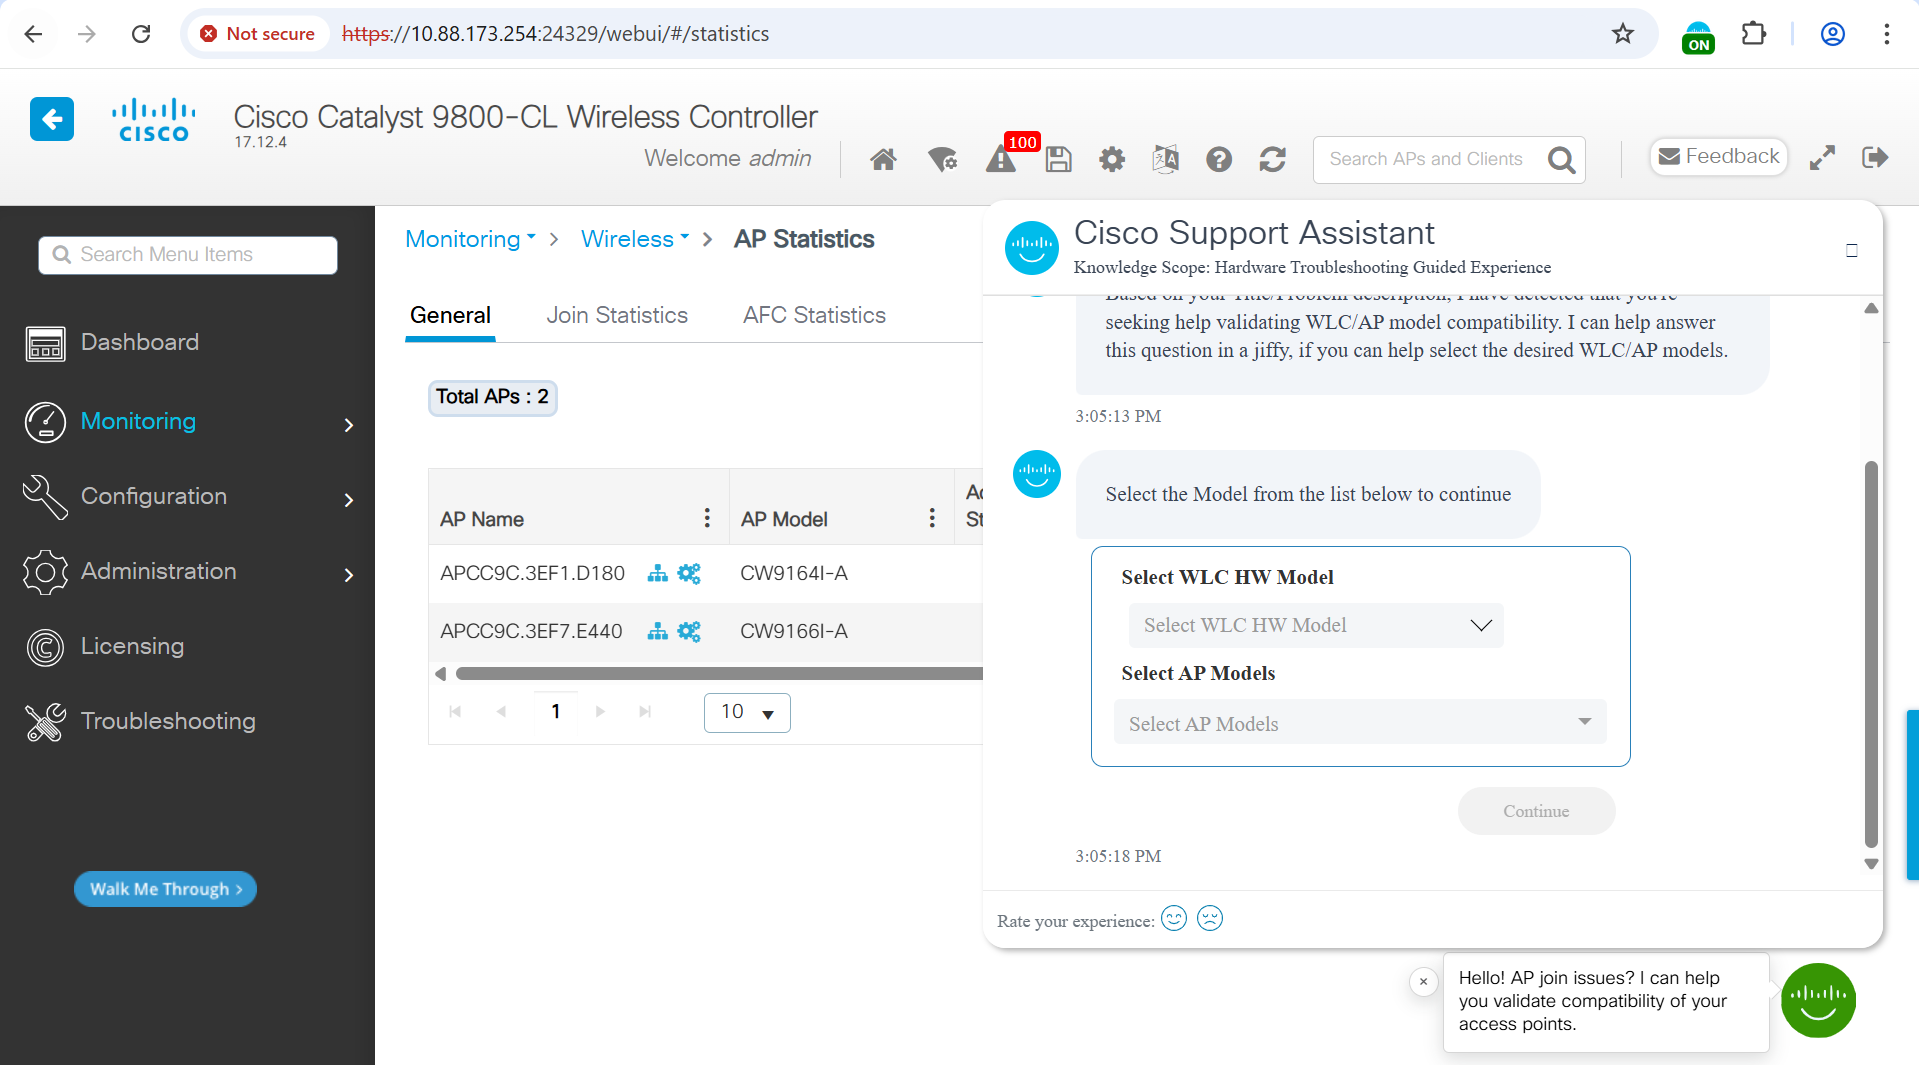
-
This functionality enhances the user's ability to troubleshoot and optimize their network configuration efficiently.
Summary
This documentation aims to provide a clear guide on how to effectively utilize the Cisco In Product Support with Catalyst 9800 Series Wireless LAN Controllers, streamlining the support process and enhancing user experience.